

5 Tips to improve your street photography
5 Tips for Improving YourStreet Photography

Street photography is more than taking random pictures on the street.
It is an art that requires planning, observation and formulating strategies.
So, what makes a good street photography photo?
I think it should have 3 elements:
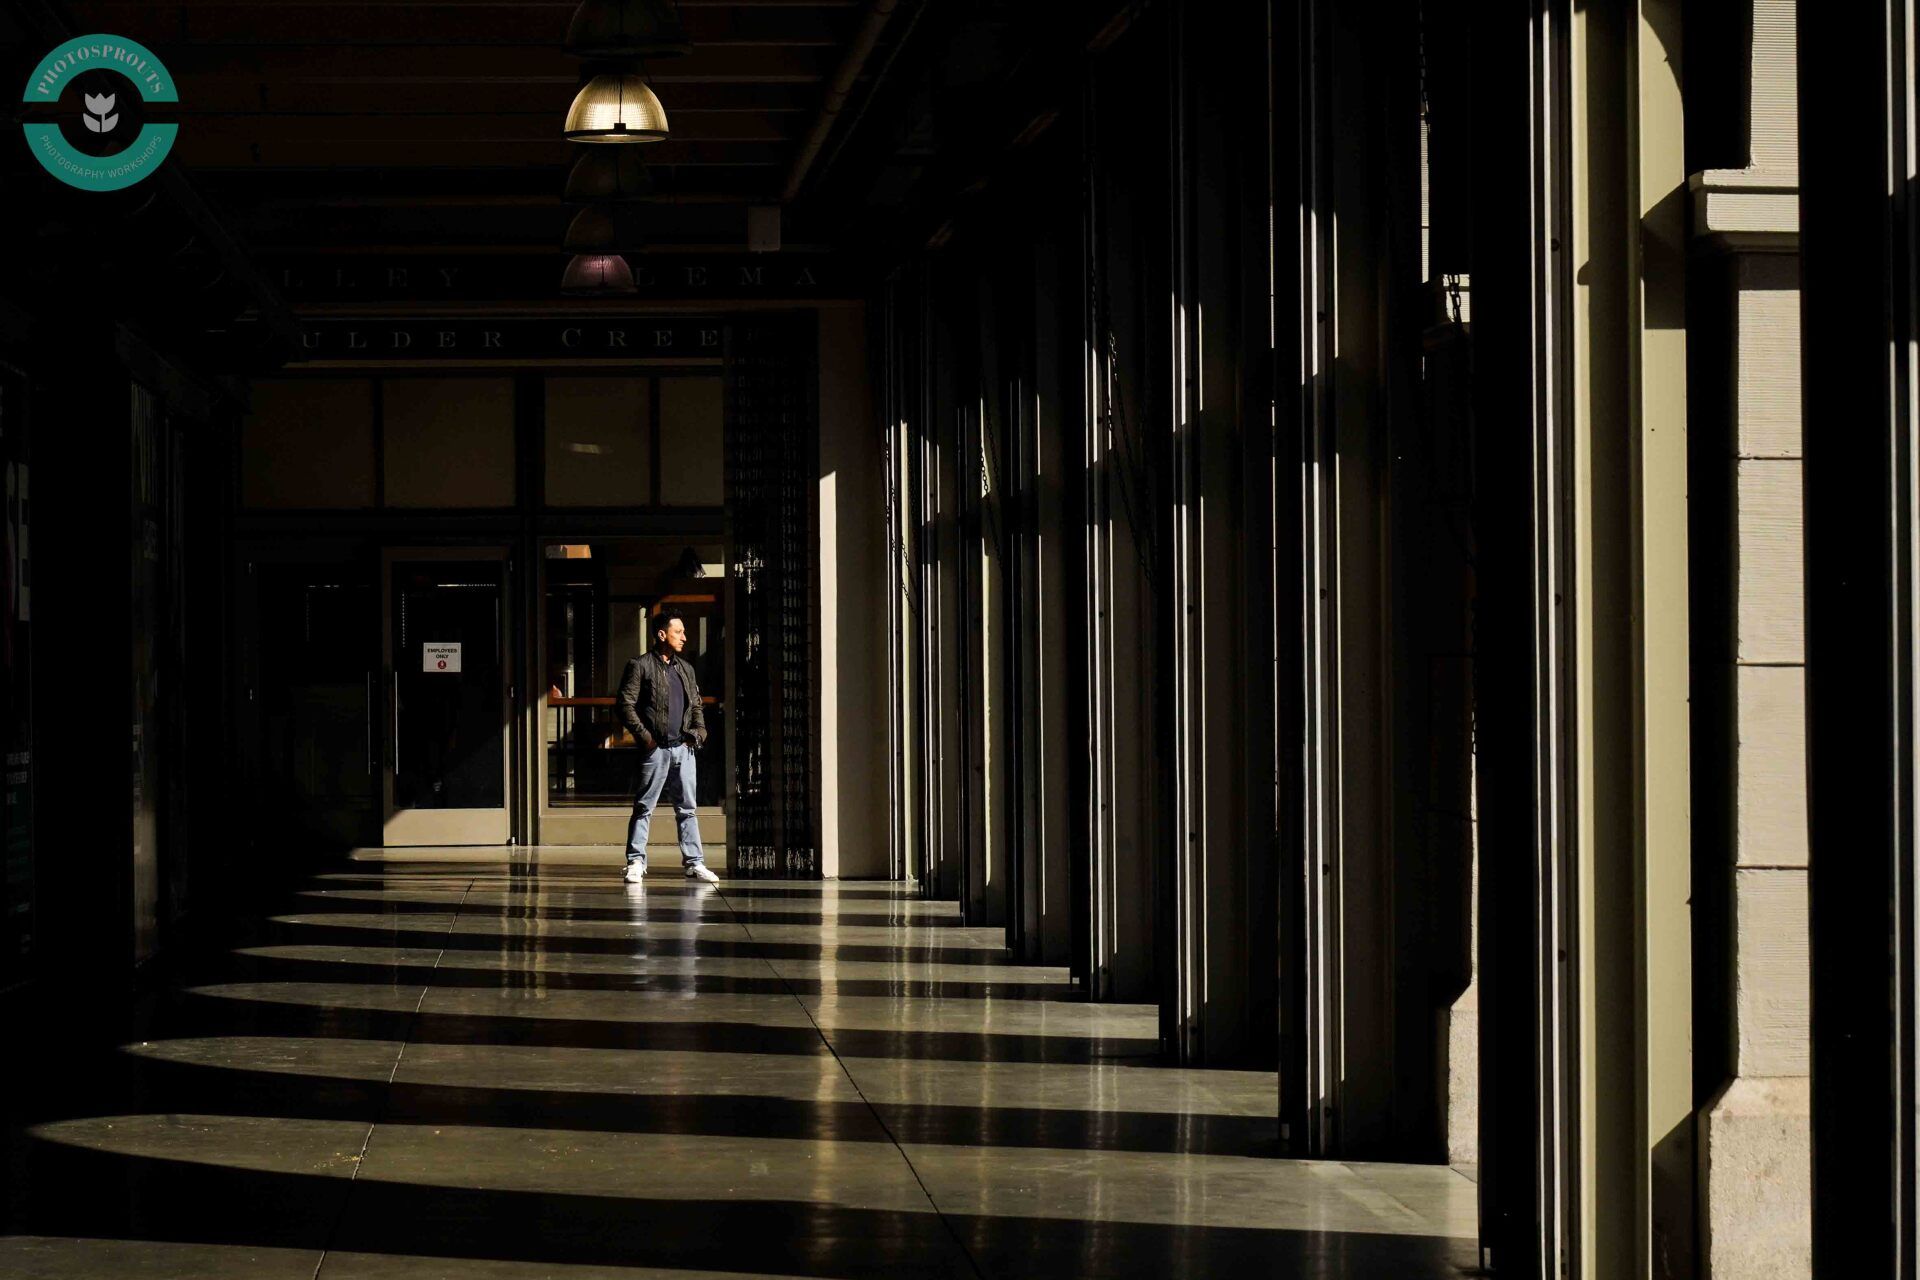
1) Clean and creative composition
2) Have at least one type of contrast: light contrast or color contrast
3) Tells a story
Street Photography is my passion and I hope sharing my experience in taking pictures on the street is helpful for other photographers.
Tip #1
See before you shoot
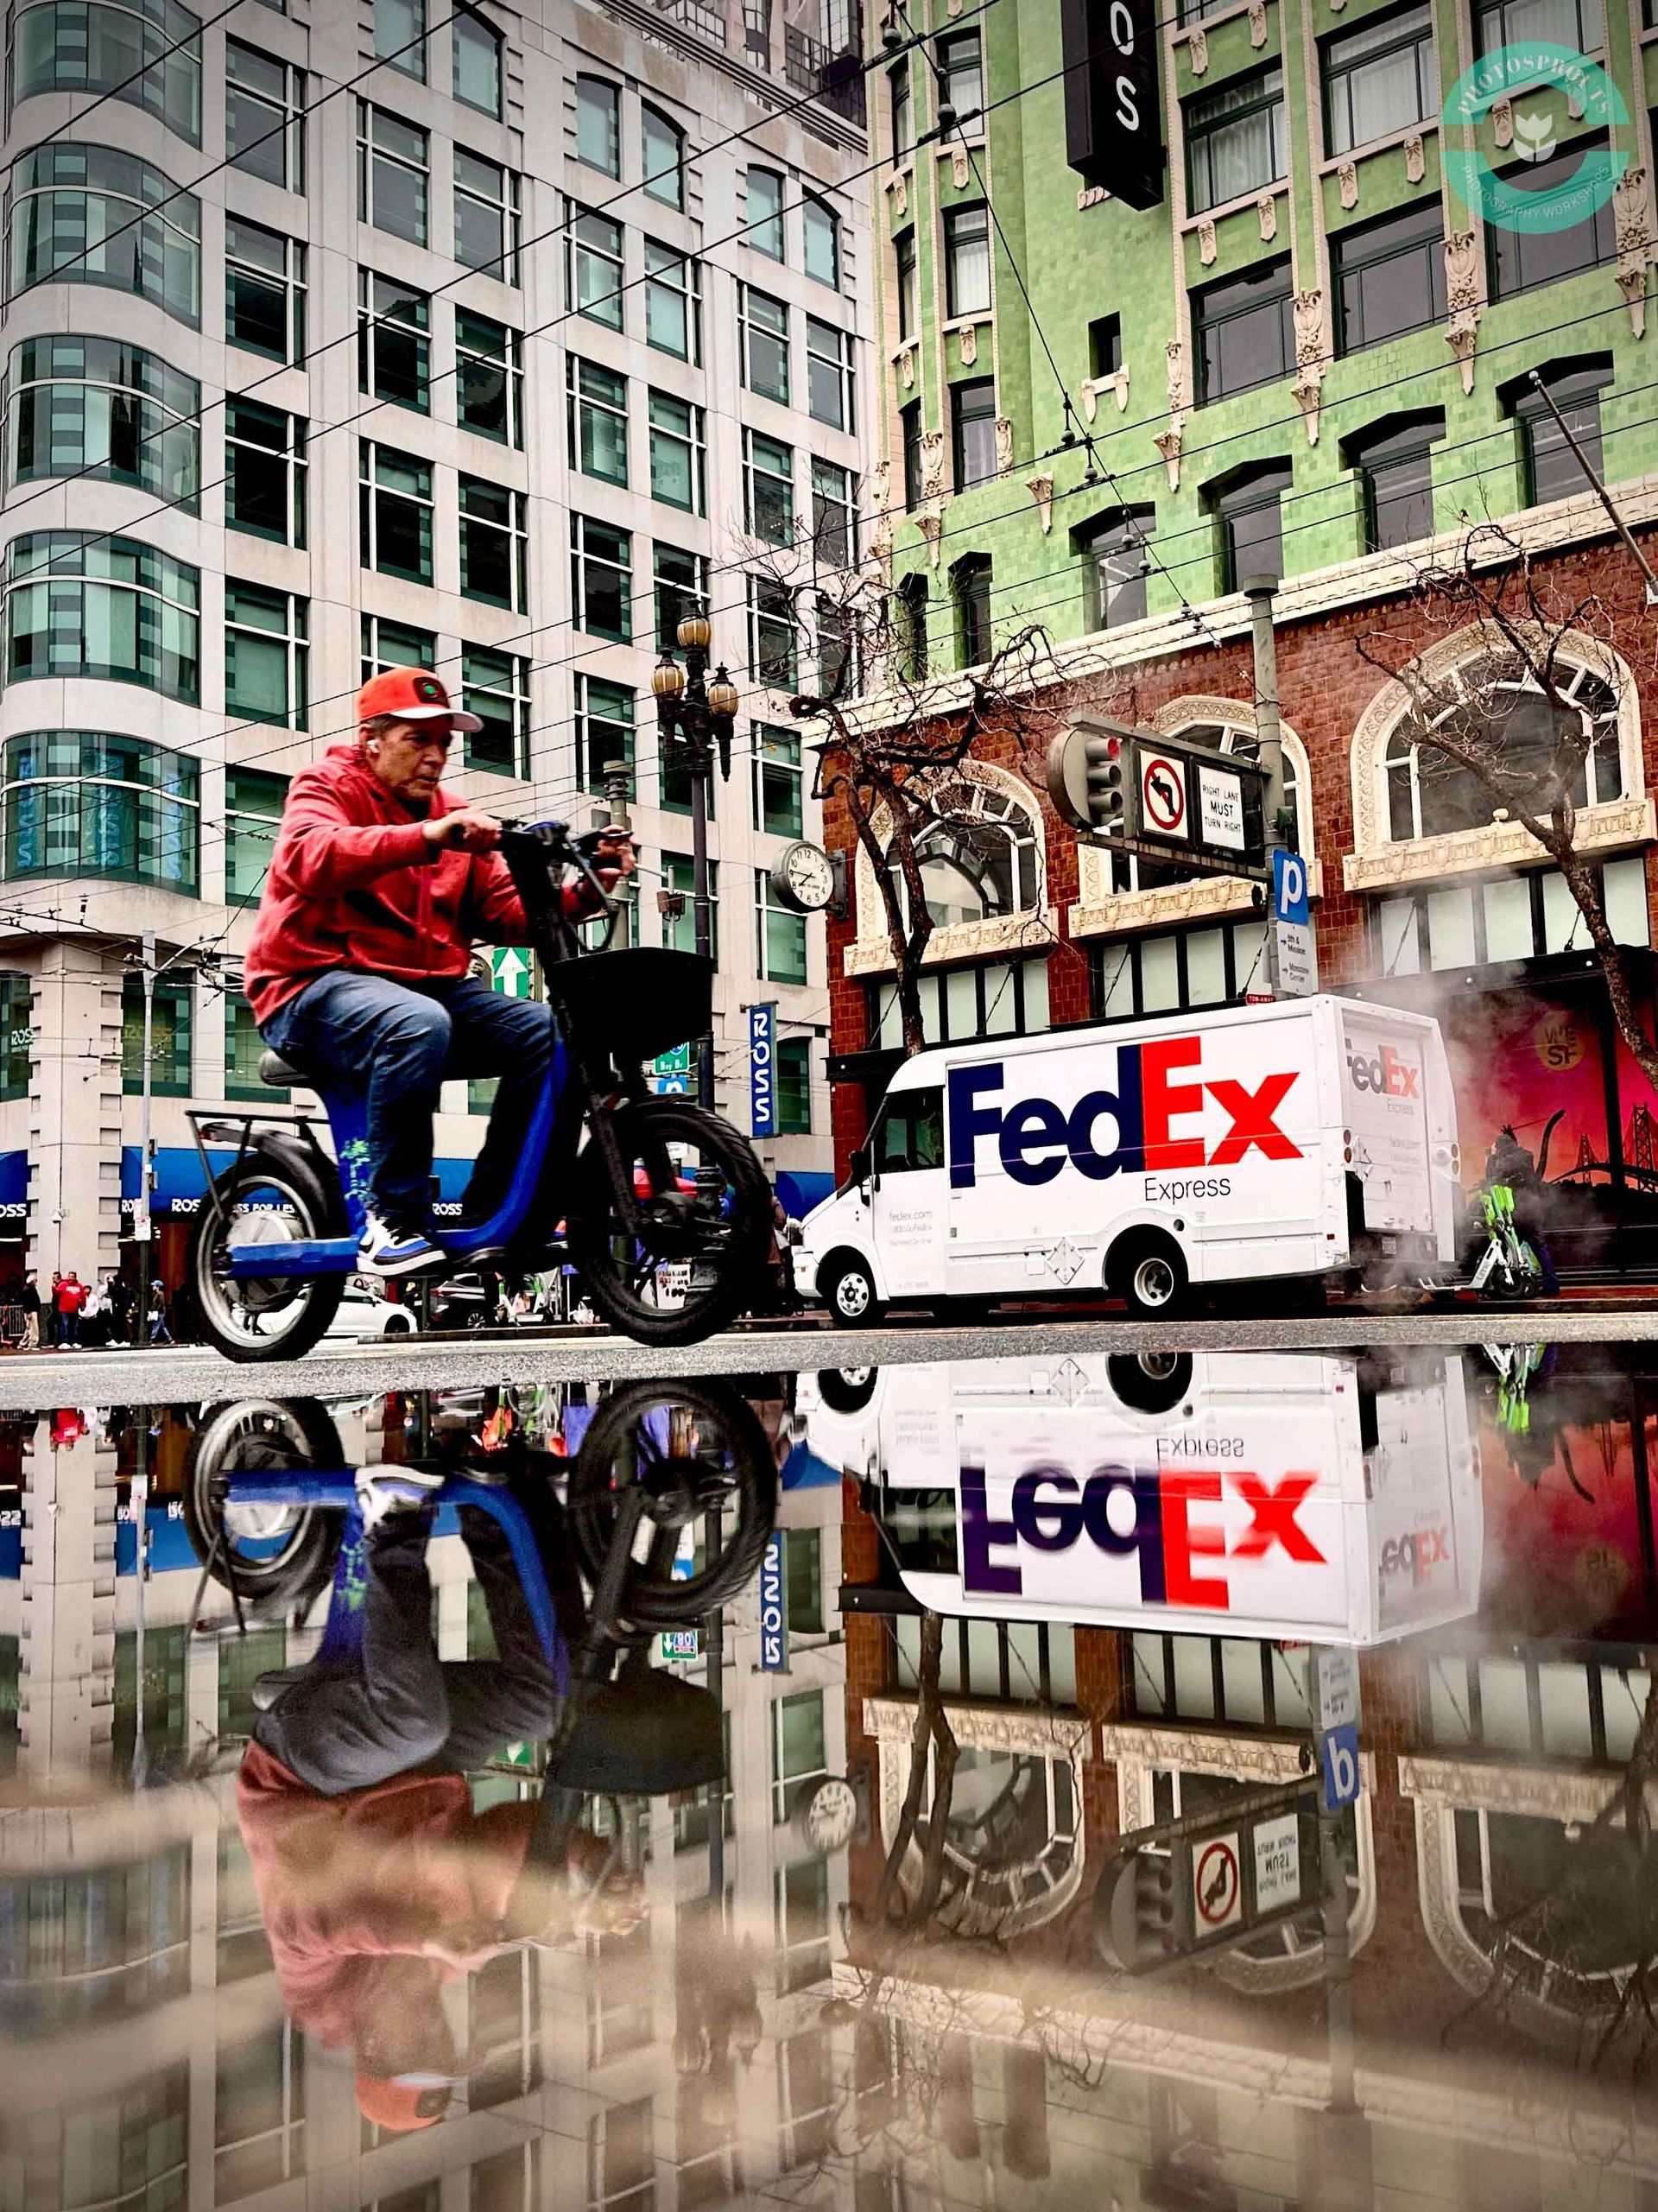
Sometimes, the photos just don't feel right: the background is so busy that the subject is blending into it. And when there are different exposures, the image won't stand out either.
The solution is to observe before you shoot. Learn to pre-visualize before you click the shutter. Ask yourself: will the background be washed out when I expose for the subject? What happens to the highlights and the shadow if I underexpose for 2 stops?
Example here. There are two exposures in the image: The exposure of the background which was in harsh light, and the exposure of the subject who was in the shade. When I exposed for the subject, the background (which was brighter than the subject) was overexposed.
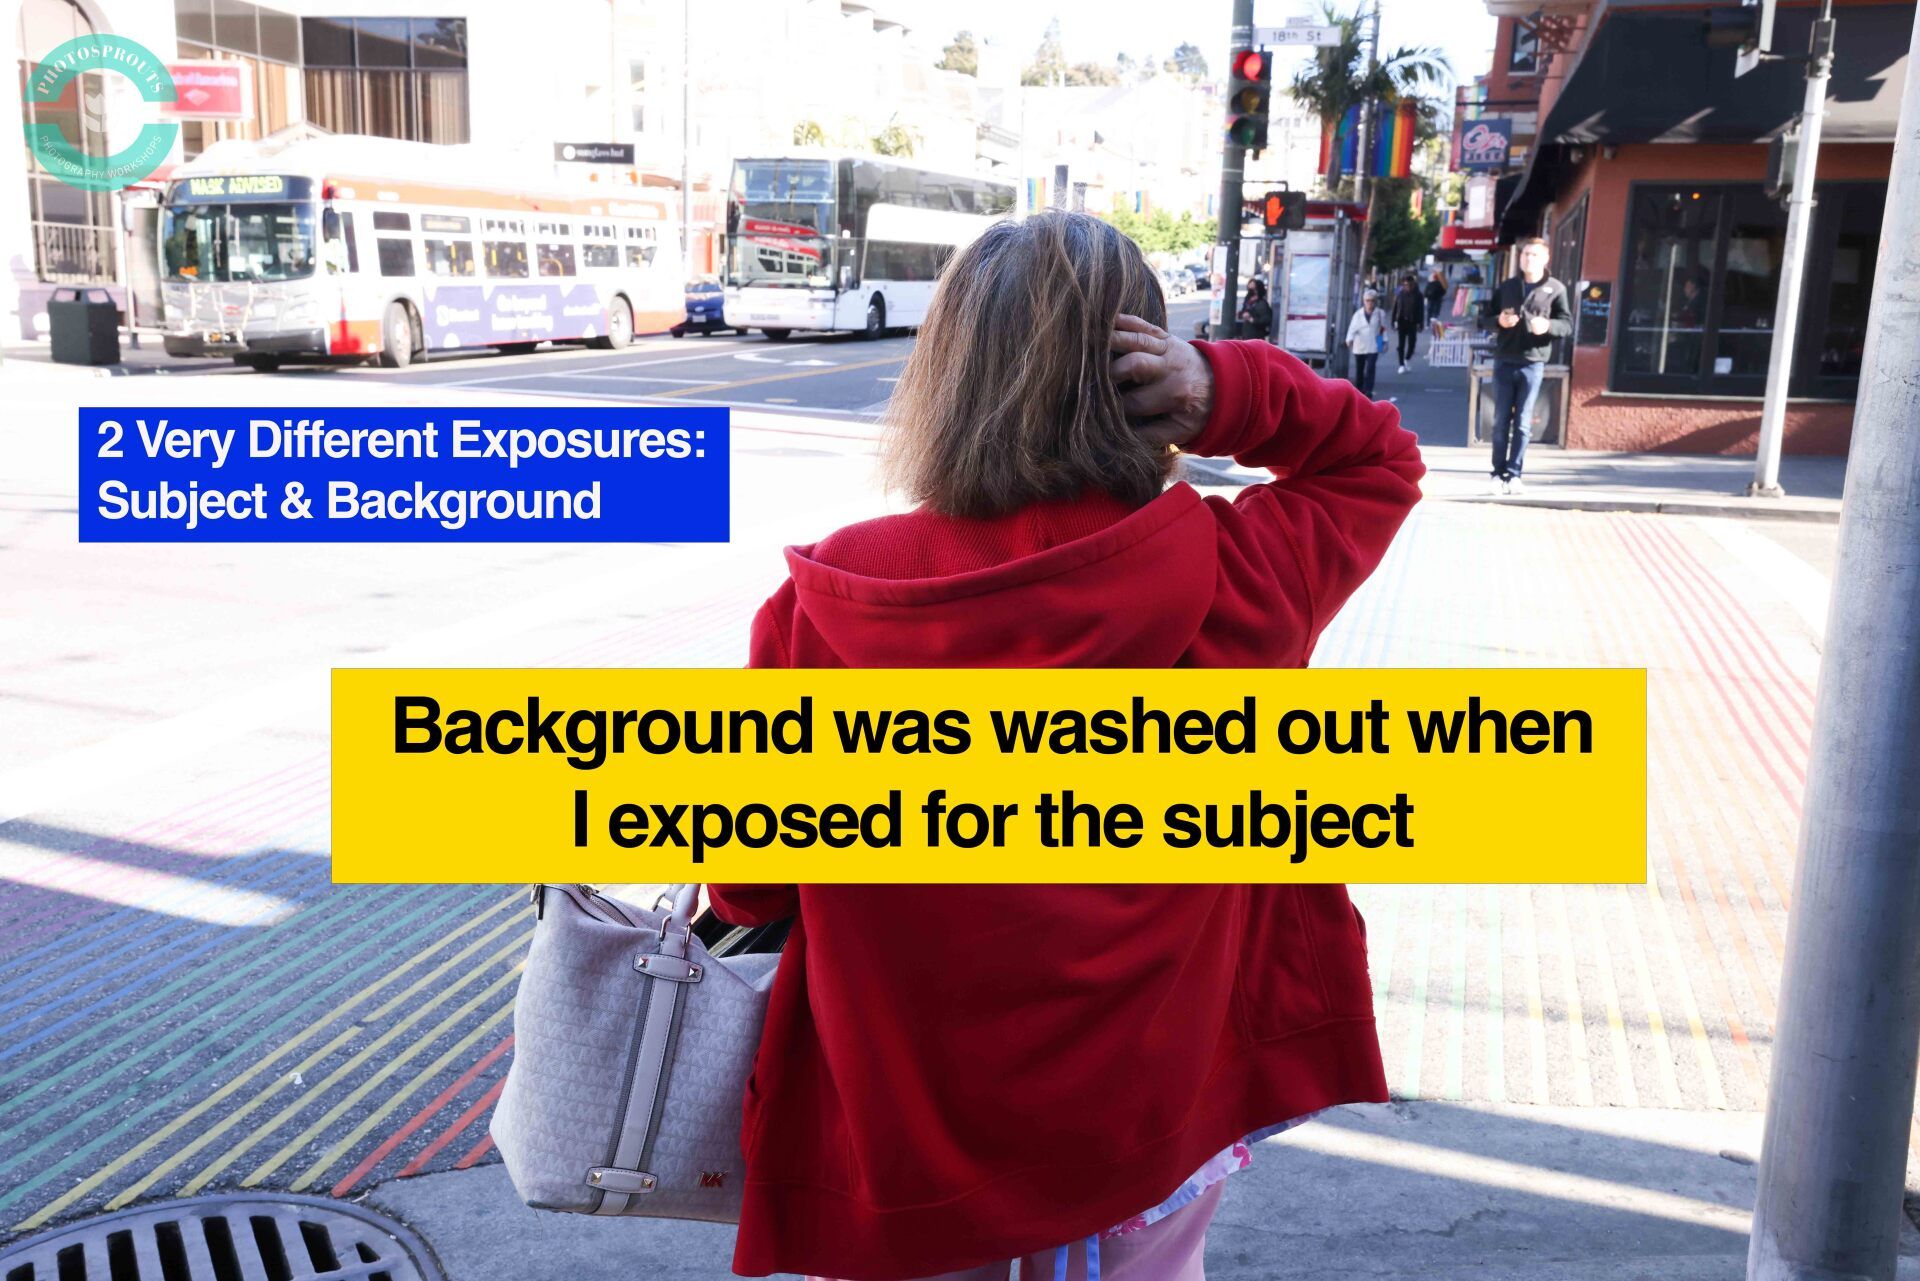
Solution for street photography:
Changed my perspective and shot from an angle where the background and the subject had the same exposure. It happens when the subject and the background were both in the light, not in the shade (and train the eyes to see it before clicking the shutter).

Solution for portrait photography (Bonus Tip):
Use an off-camera flash to balance the ambient and the subject exposures.
Check out Photosprouts' OFC tutorials on Youtube to learn more.
Tip #2
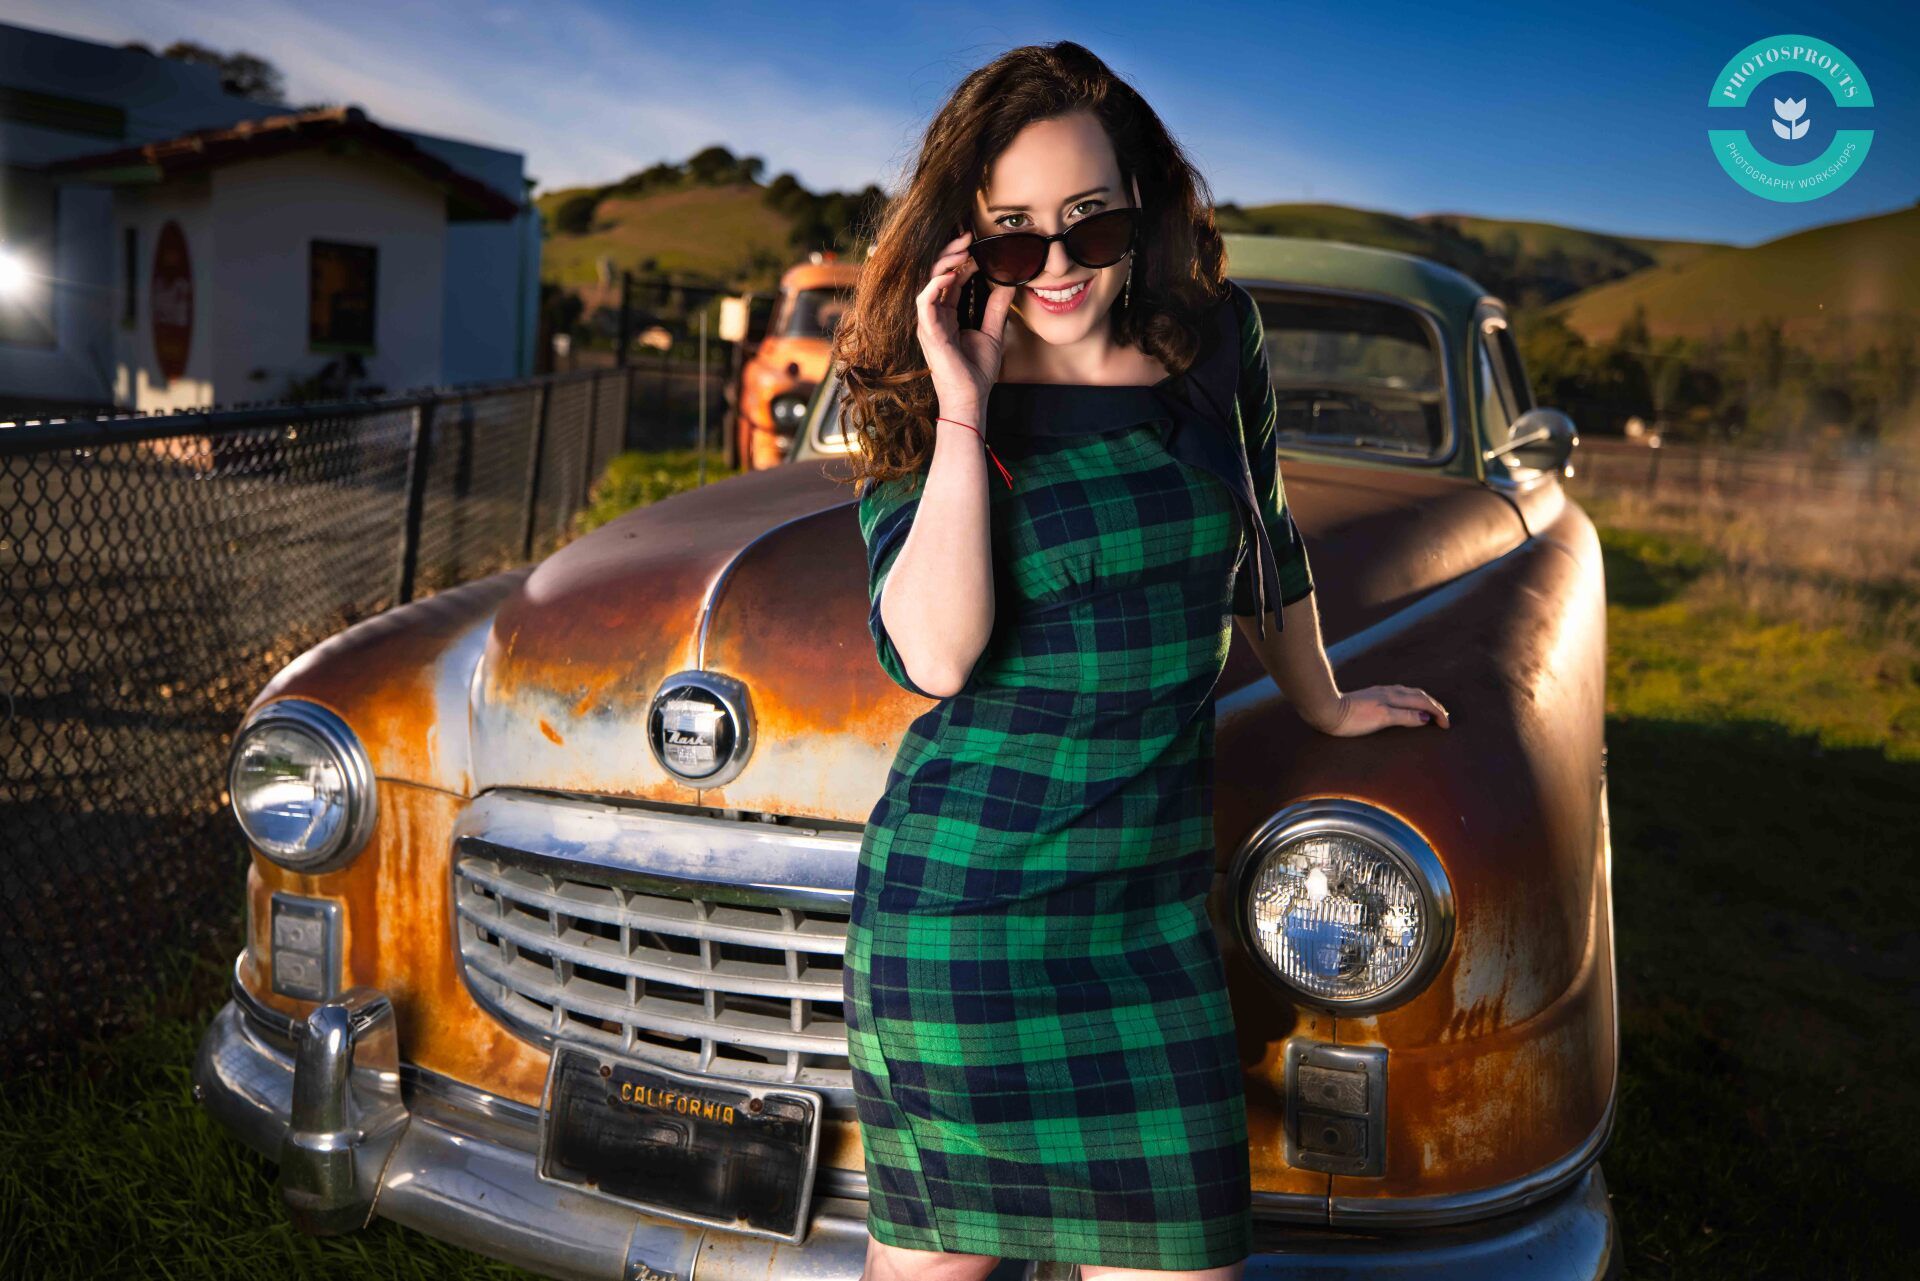
Look for color contrast
Not every location allows you to see vibrant colors.
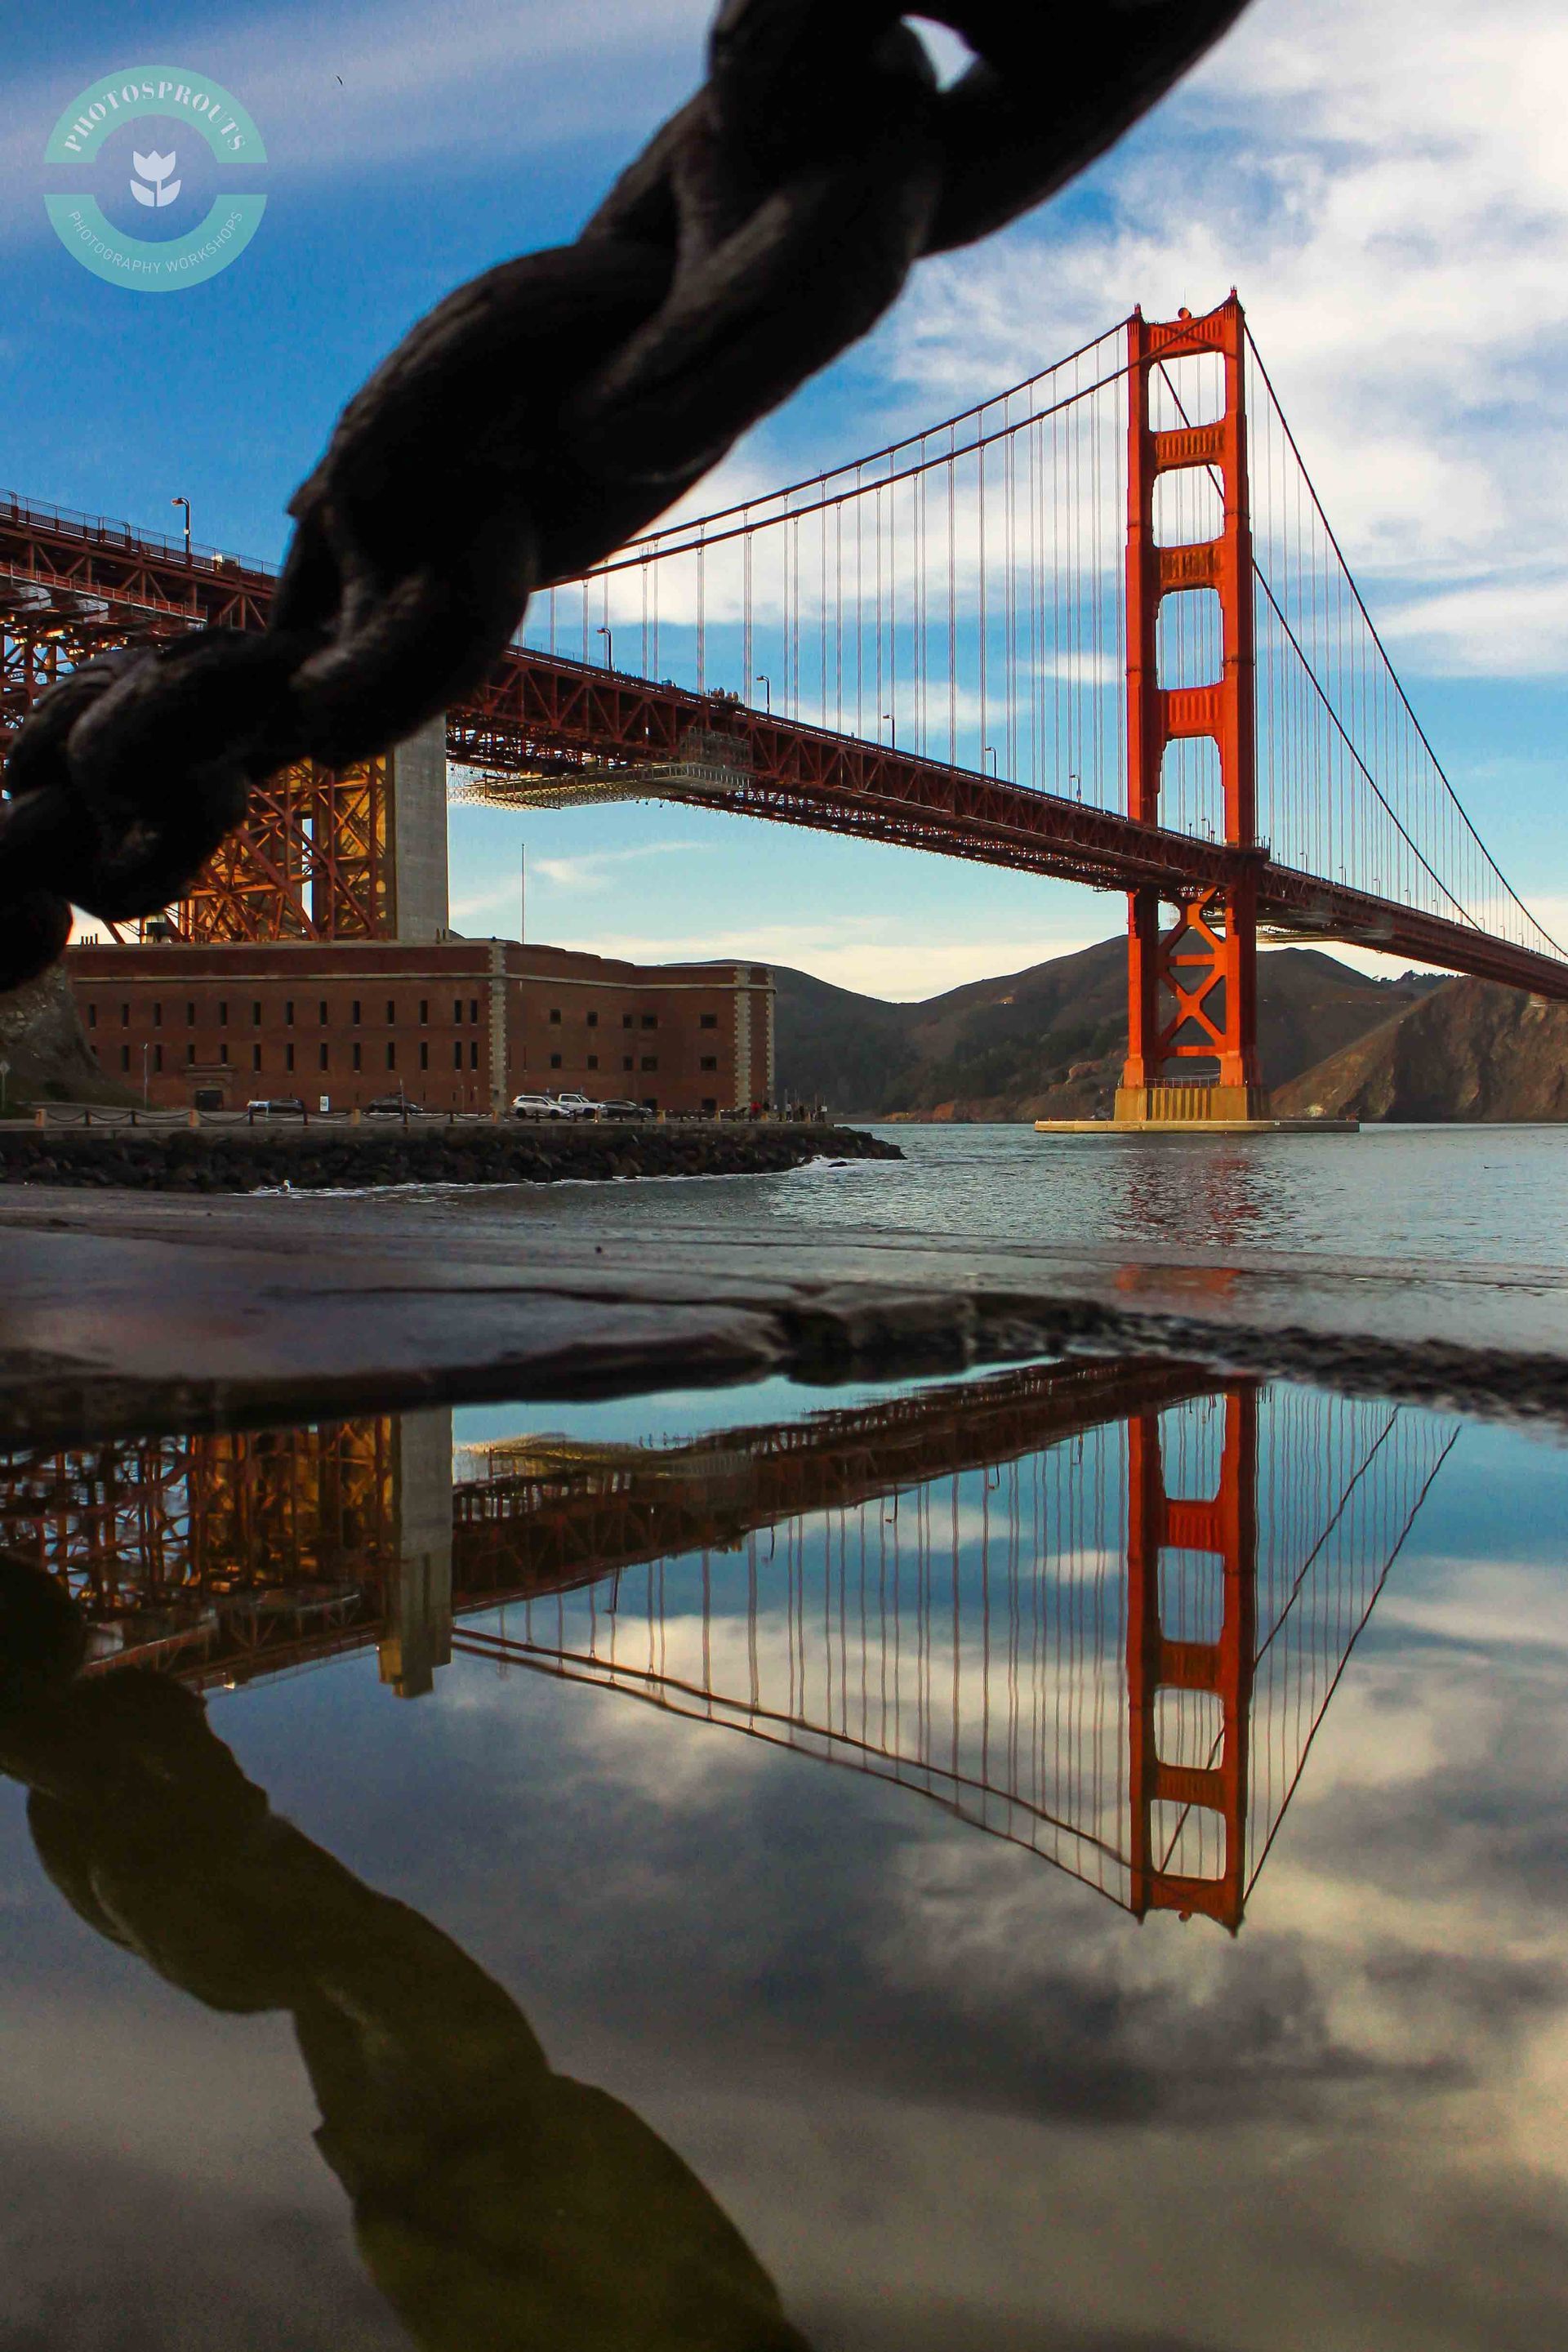
Plan to shoot in areas where there are interesting subjects and colorful surroundings. Which location you think will let you see more color contrasts? The Financial or the Castro District? The Fidi is great if you are going for black & white images, but if you want to add more color elements to your work, then definitely the latter one.
Castro and Haight-Ashbury Districts:

The Financial District:
Tip #3
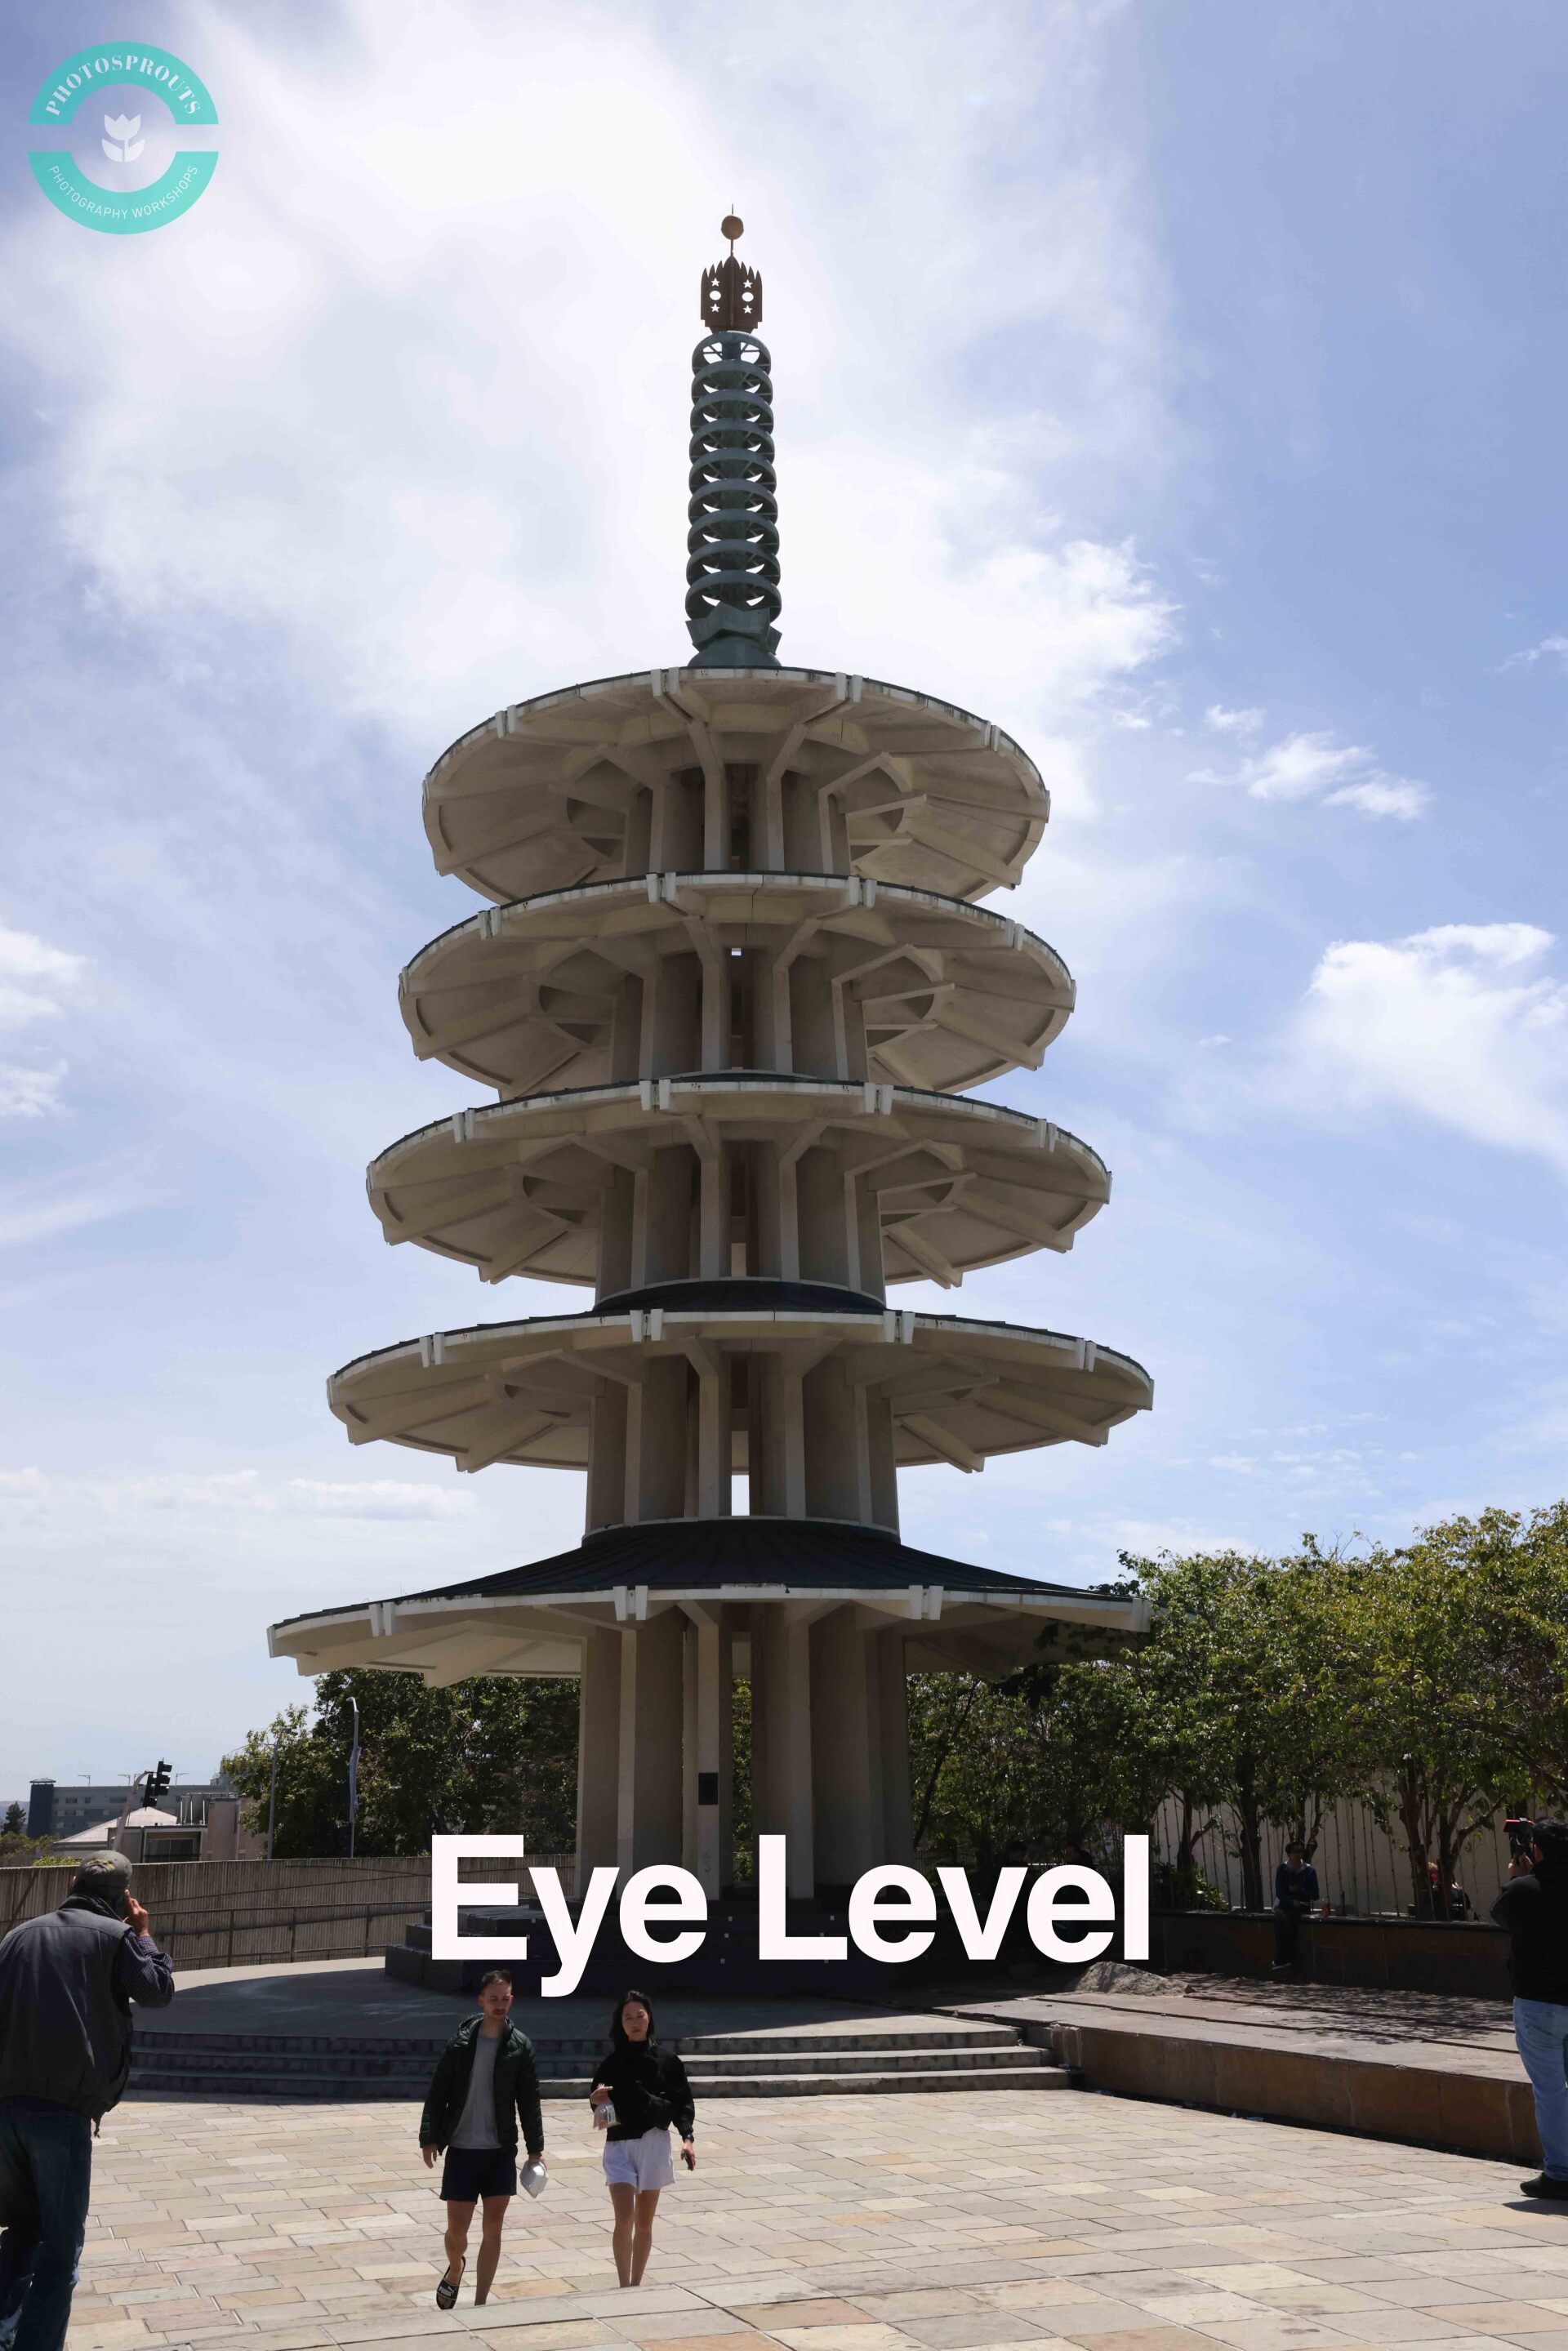
Shoot from a lower angle, especially when you are using a wide angle lens.
Wide angle lenses exaggerate while telephoto lenses compress.
Whichever object that is closest to a wide angle lens will look longer, bigger and wider than it actually is. I often bend down to shoot from a lower angle to create space and distortion when I'm using my Canon 15-35mm F2.8 RF lens.
Having a flip screen on the camera also makes shooting from a low angle easier.

Tip #4
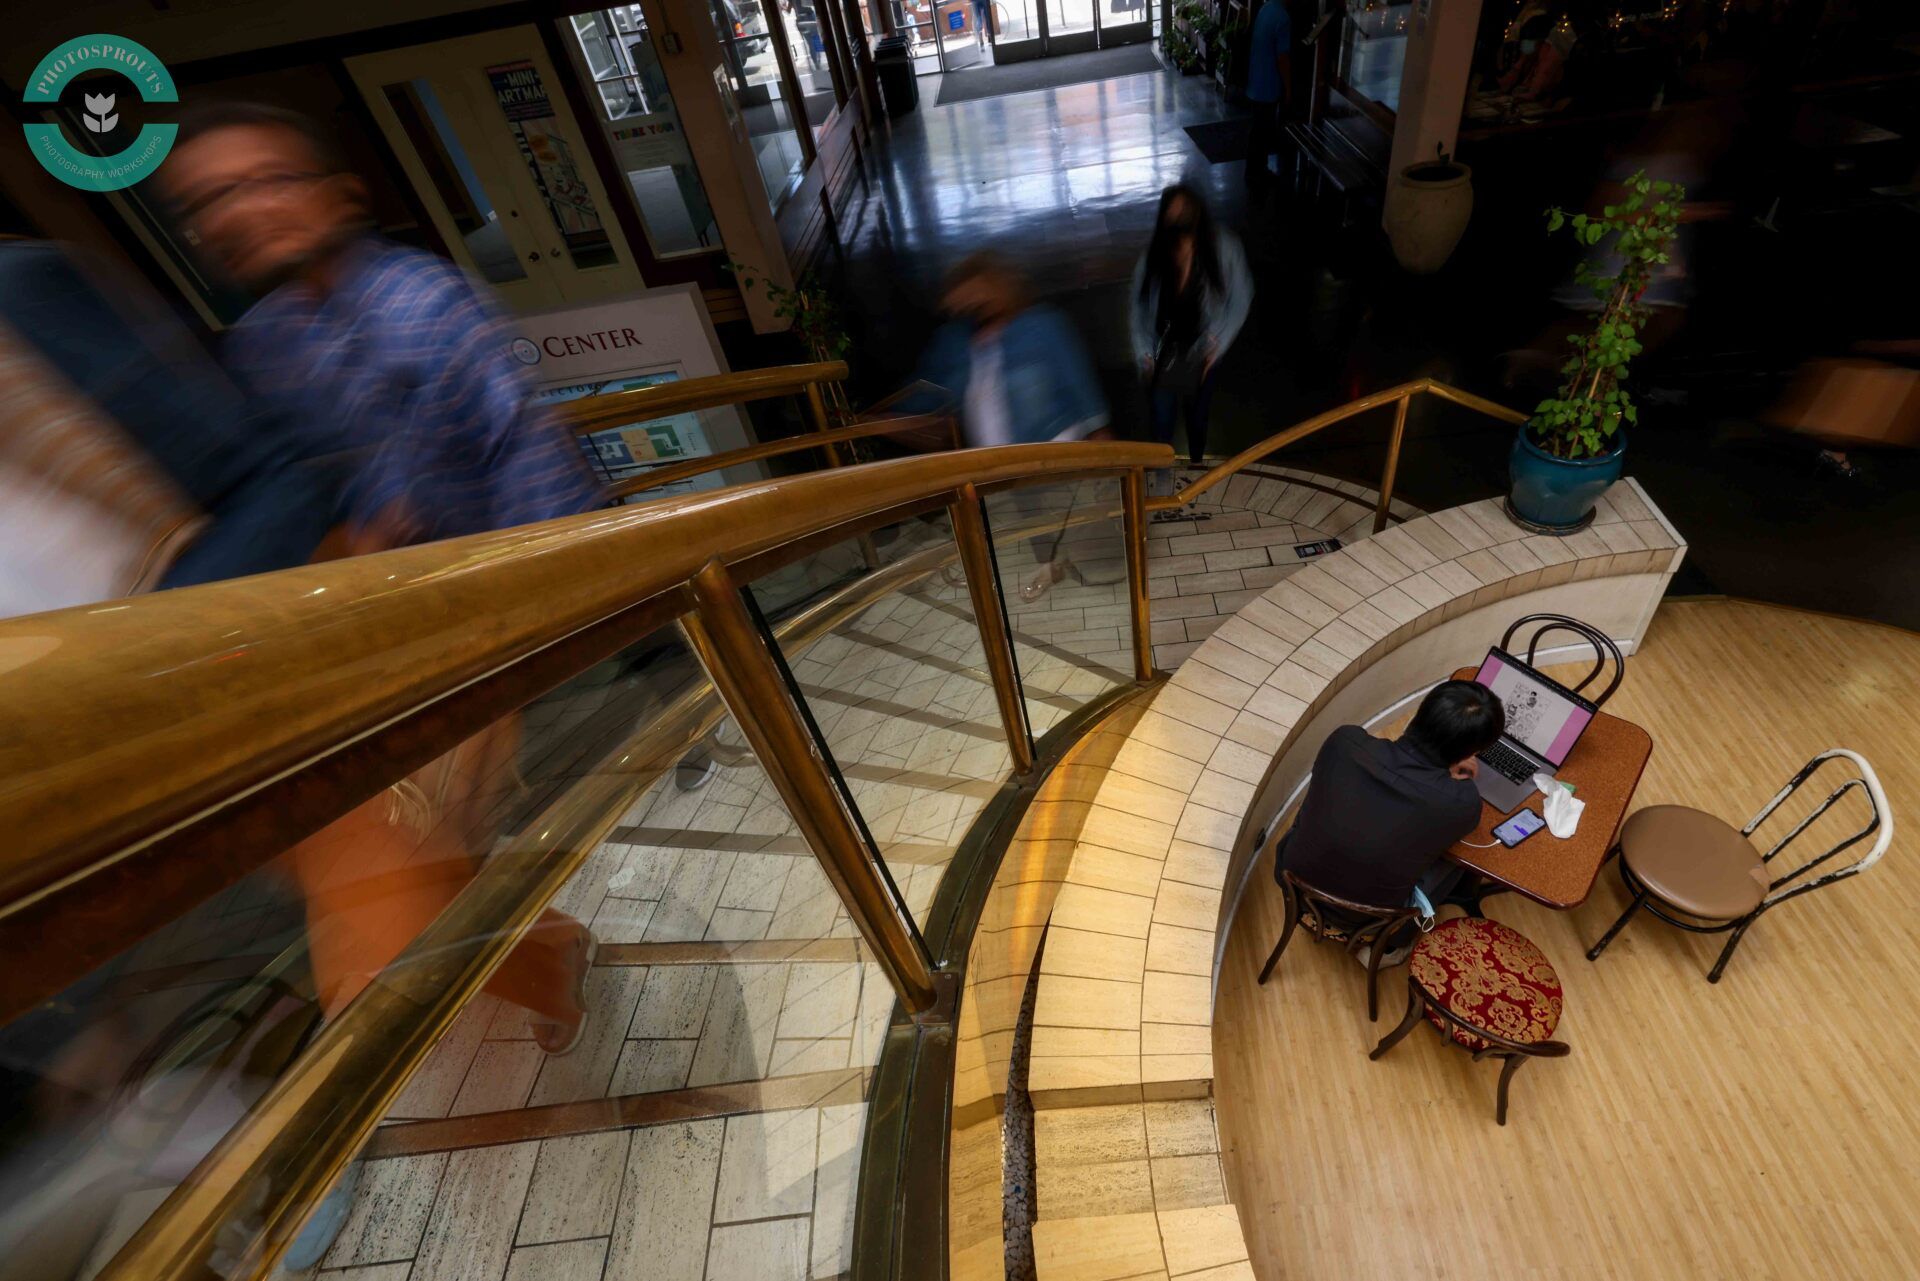
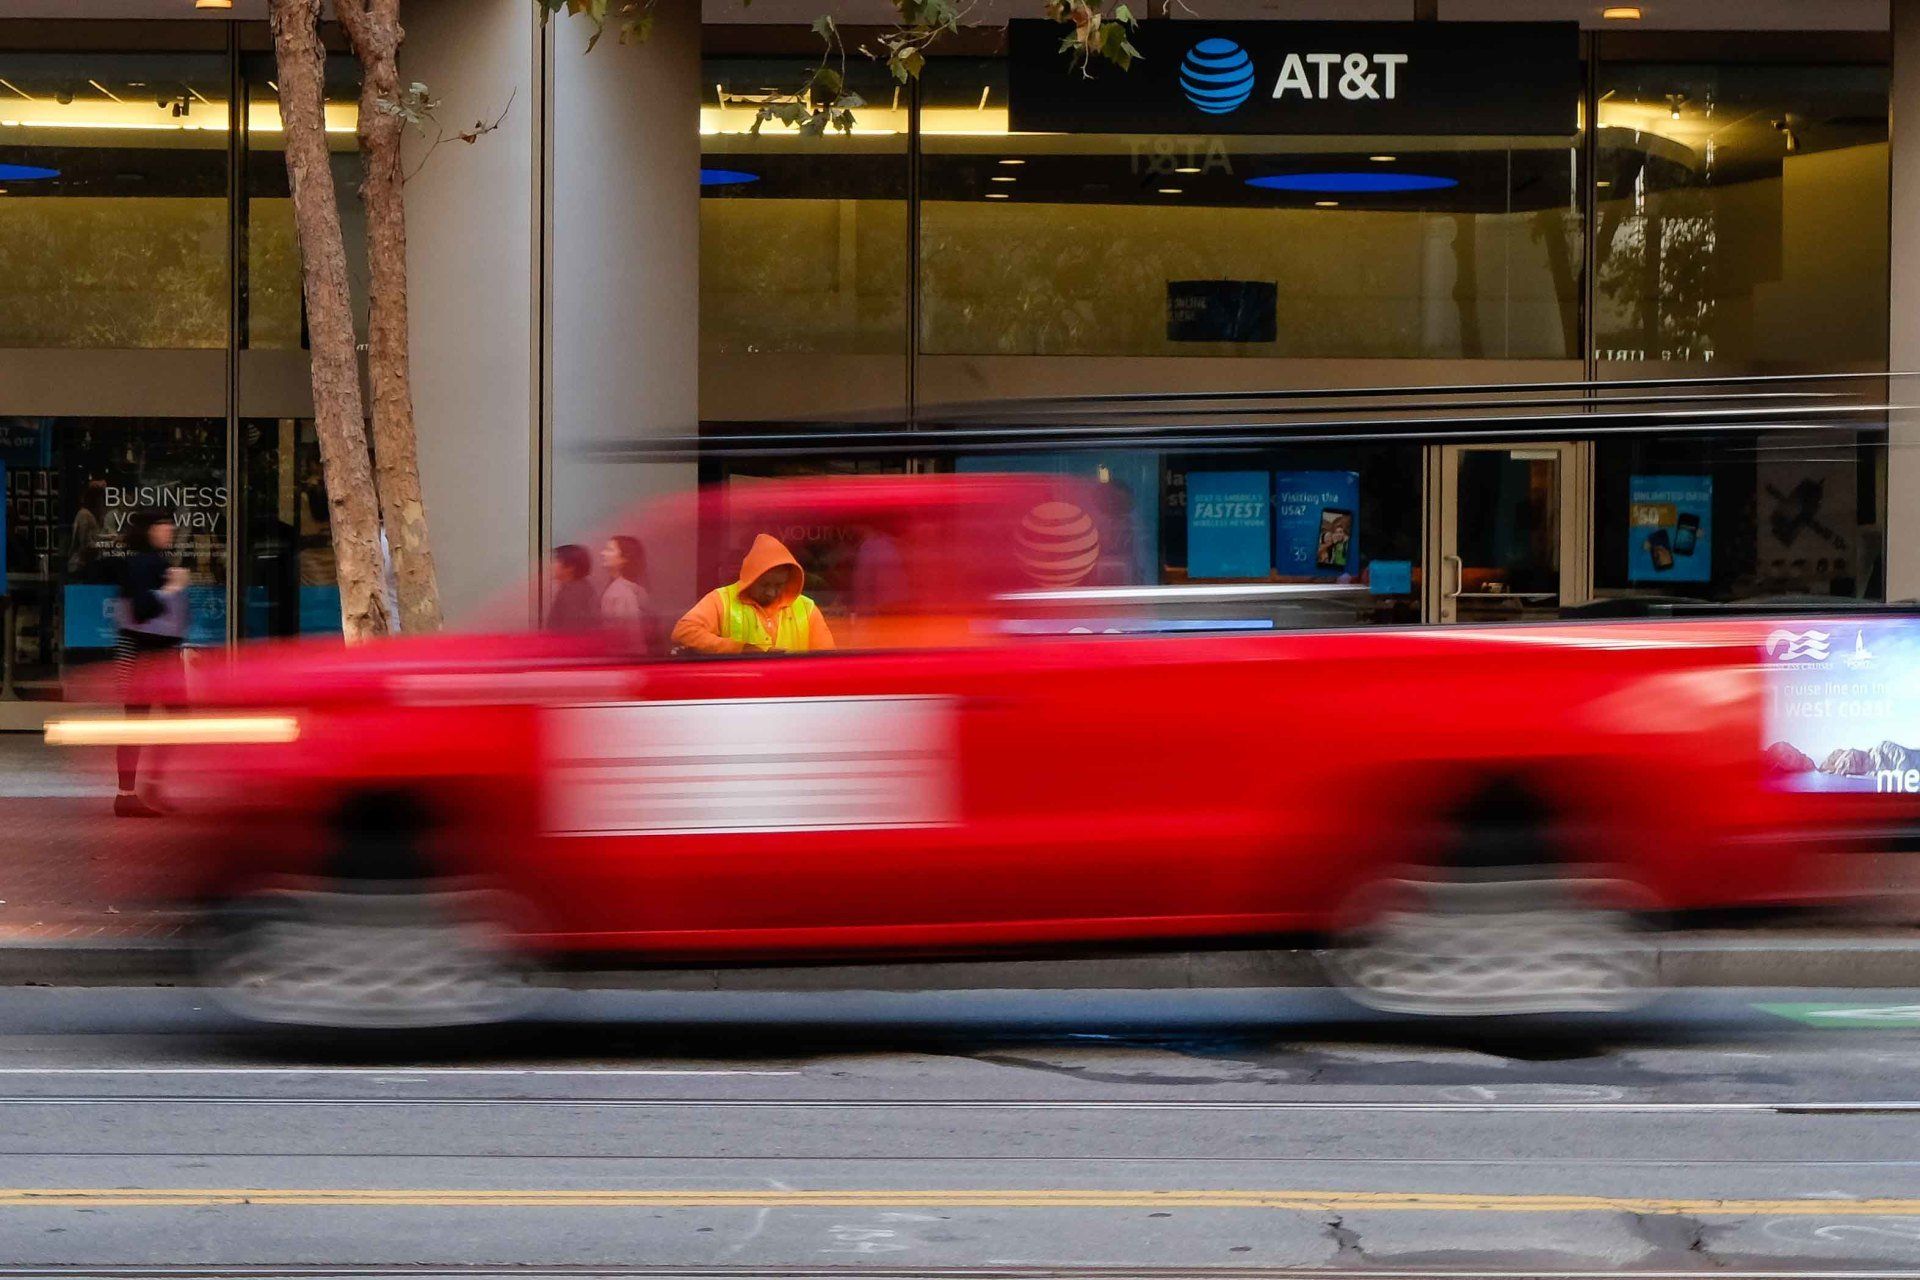
Use long shutter speed when the light is flat
A good street photography photo should have some light contrasts.
However, it doesn't mean that we are out of luck in an overcast day. Simply use the situation to your advantage: when the light is flat or when there's no light contrast, it is the best time to use long shutter speed to motion blur the subject. The light in this mall in Japantown was flat (actually, the light is flat in most indoor conditions), so I slowed down the shutter speed to 1/4s to motion-blurred the people walking by.
Tip #5
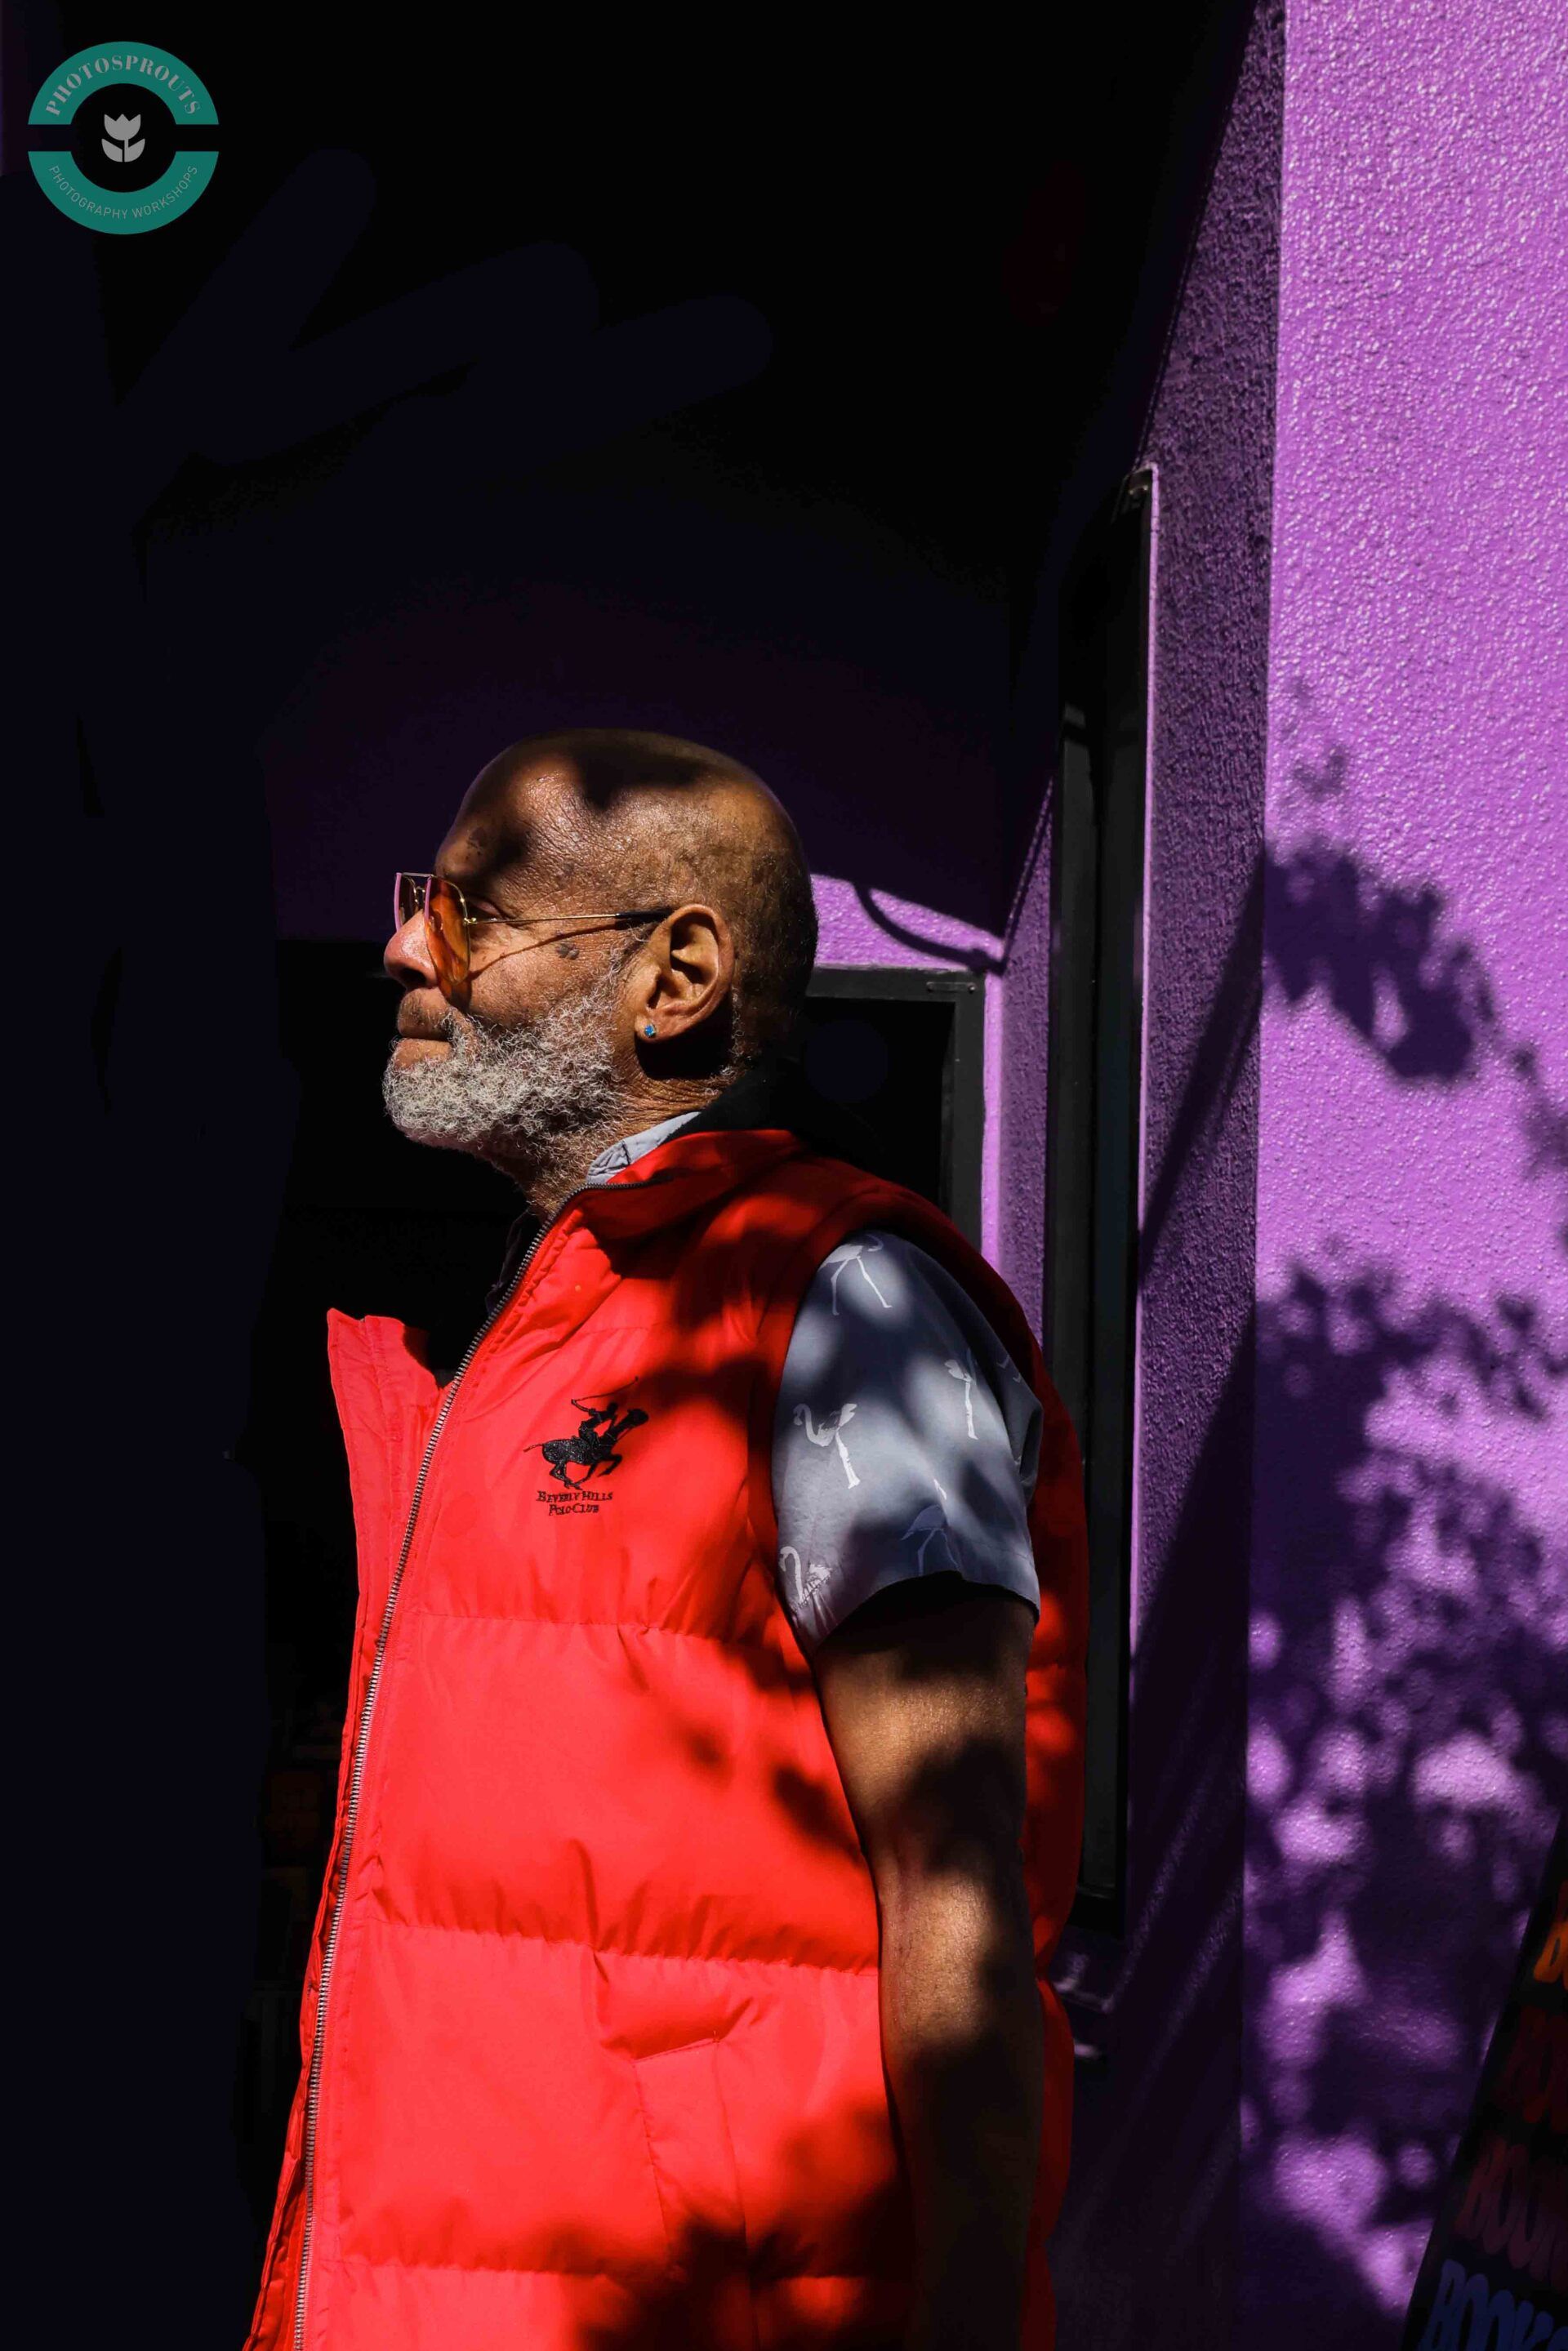
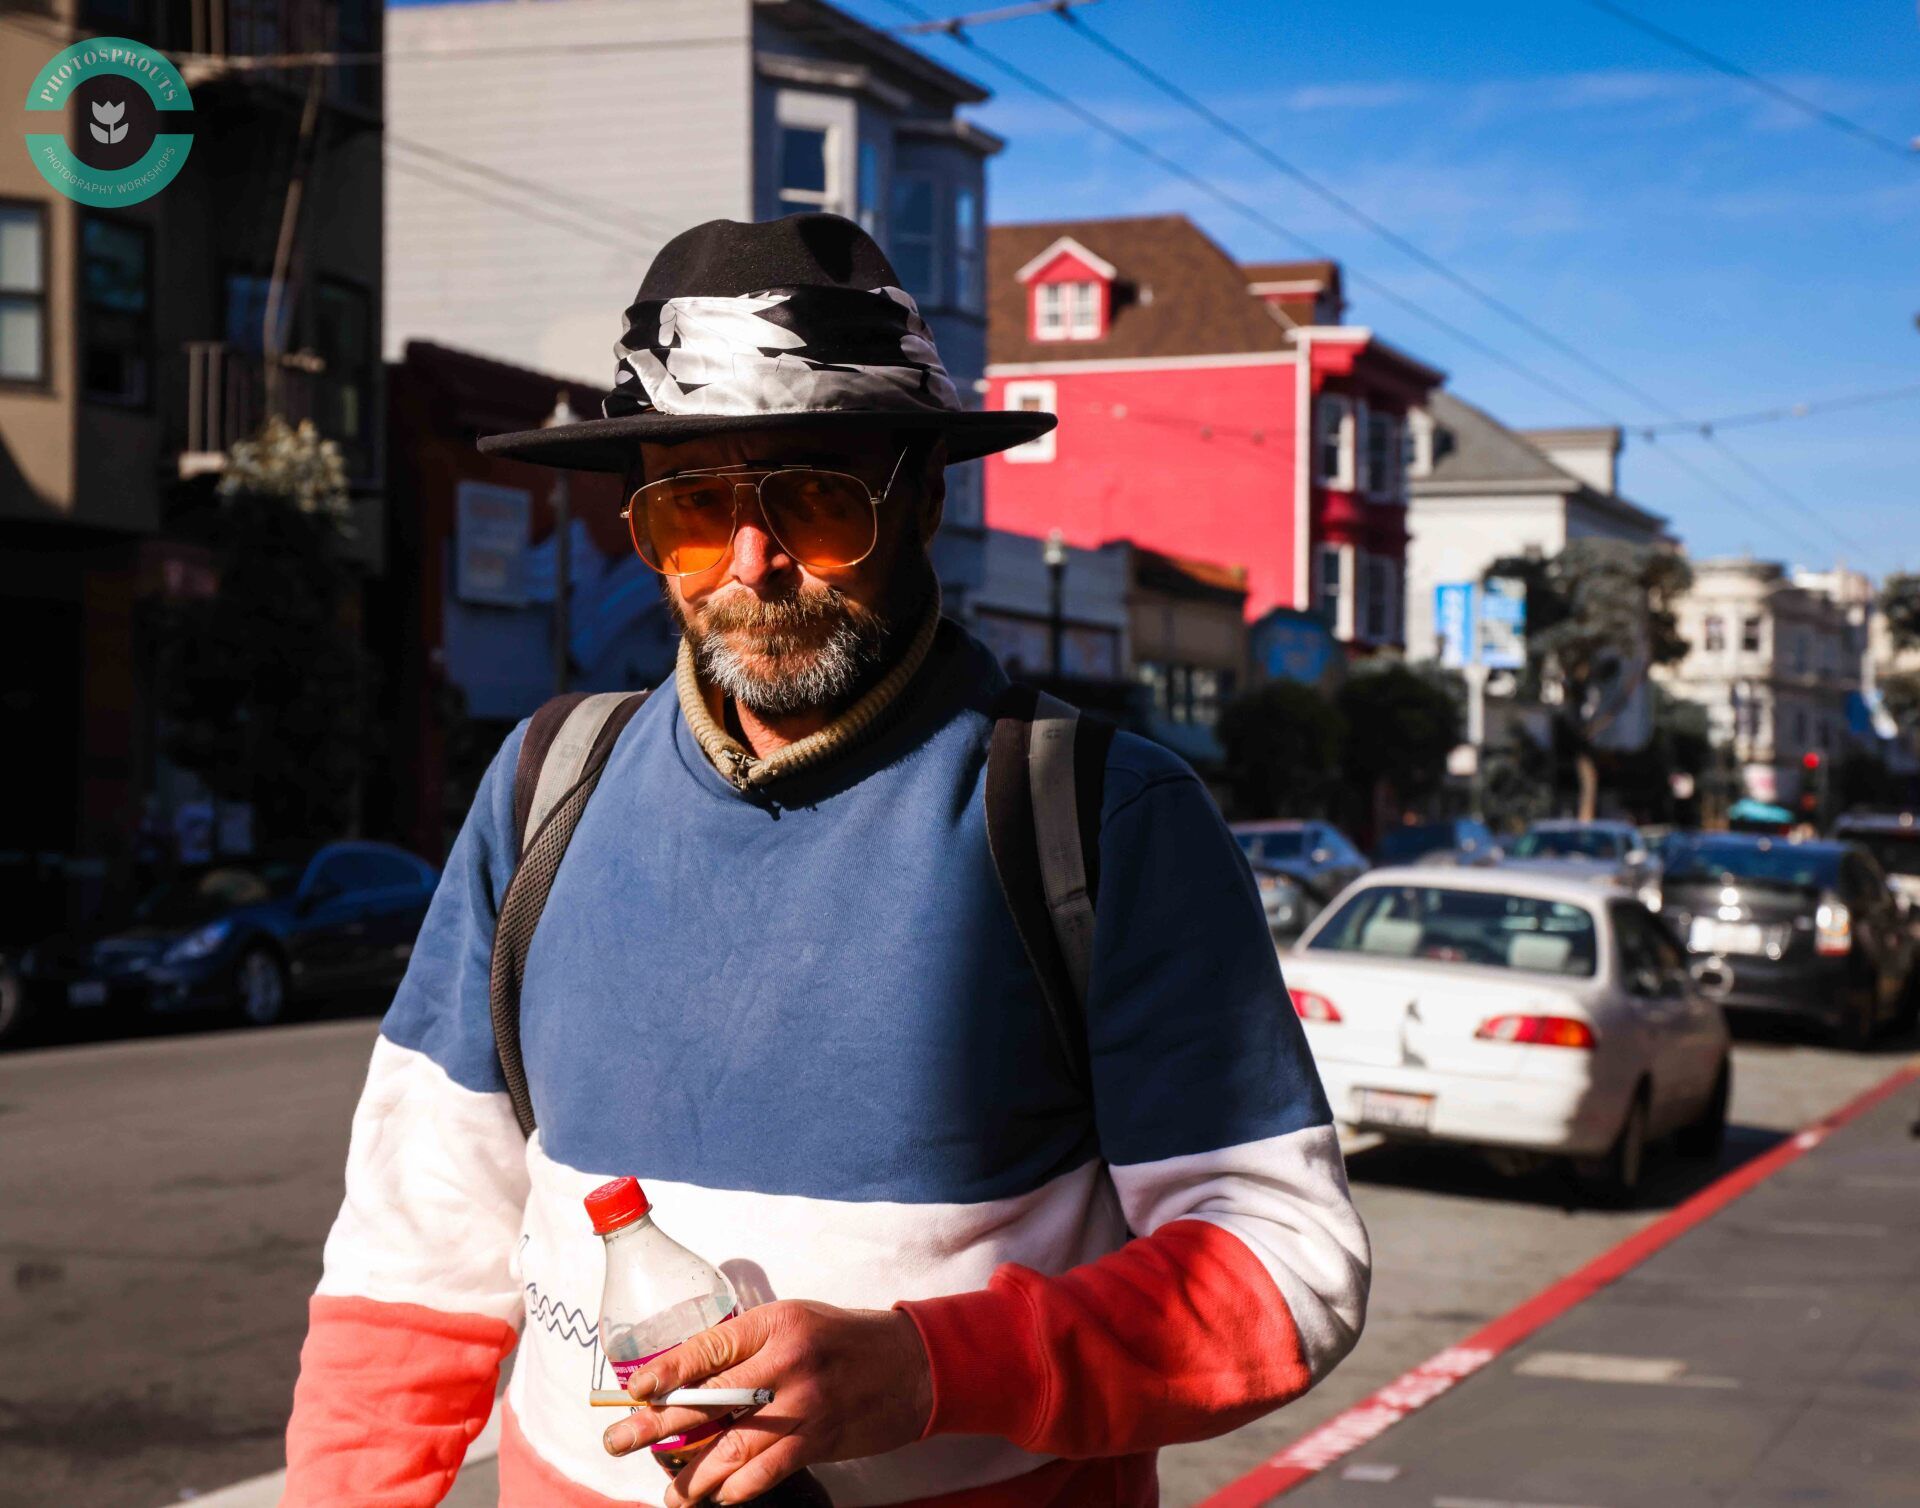
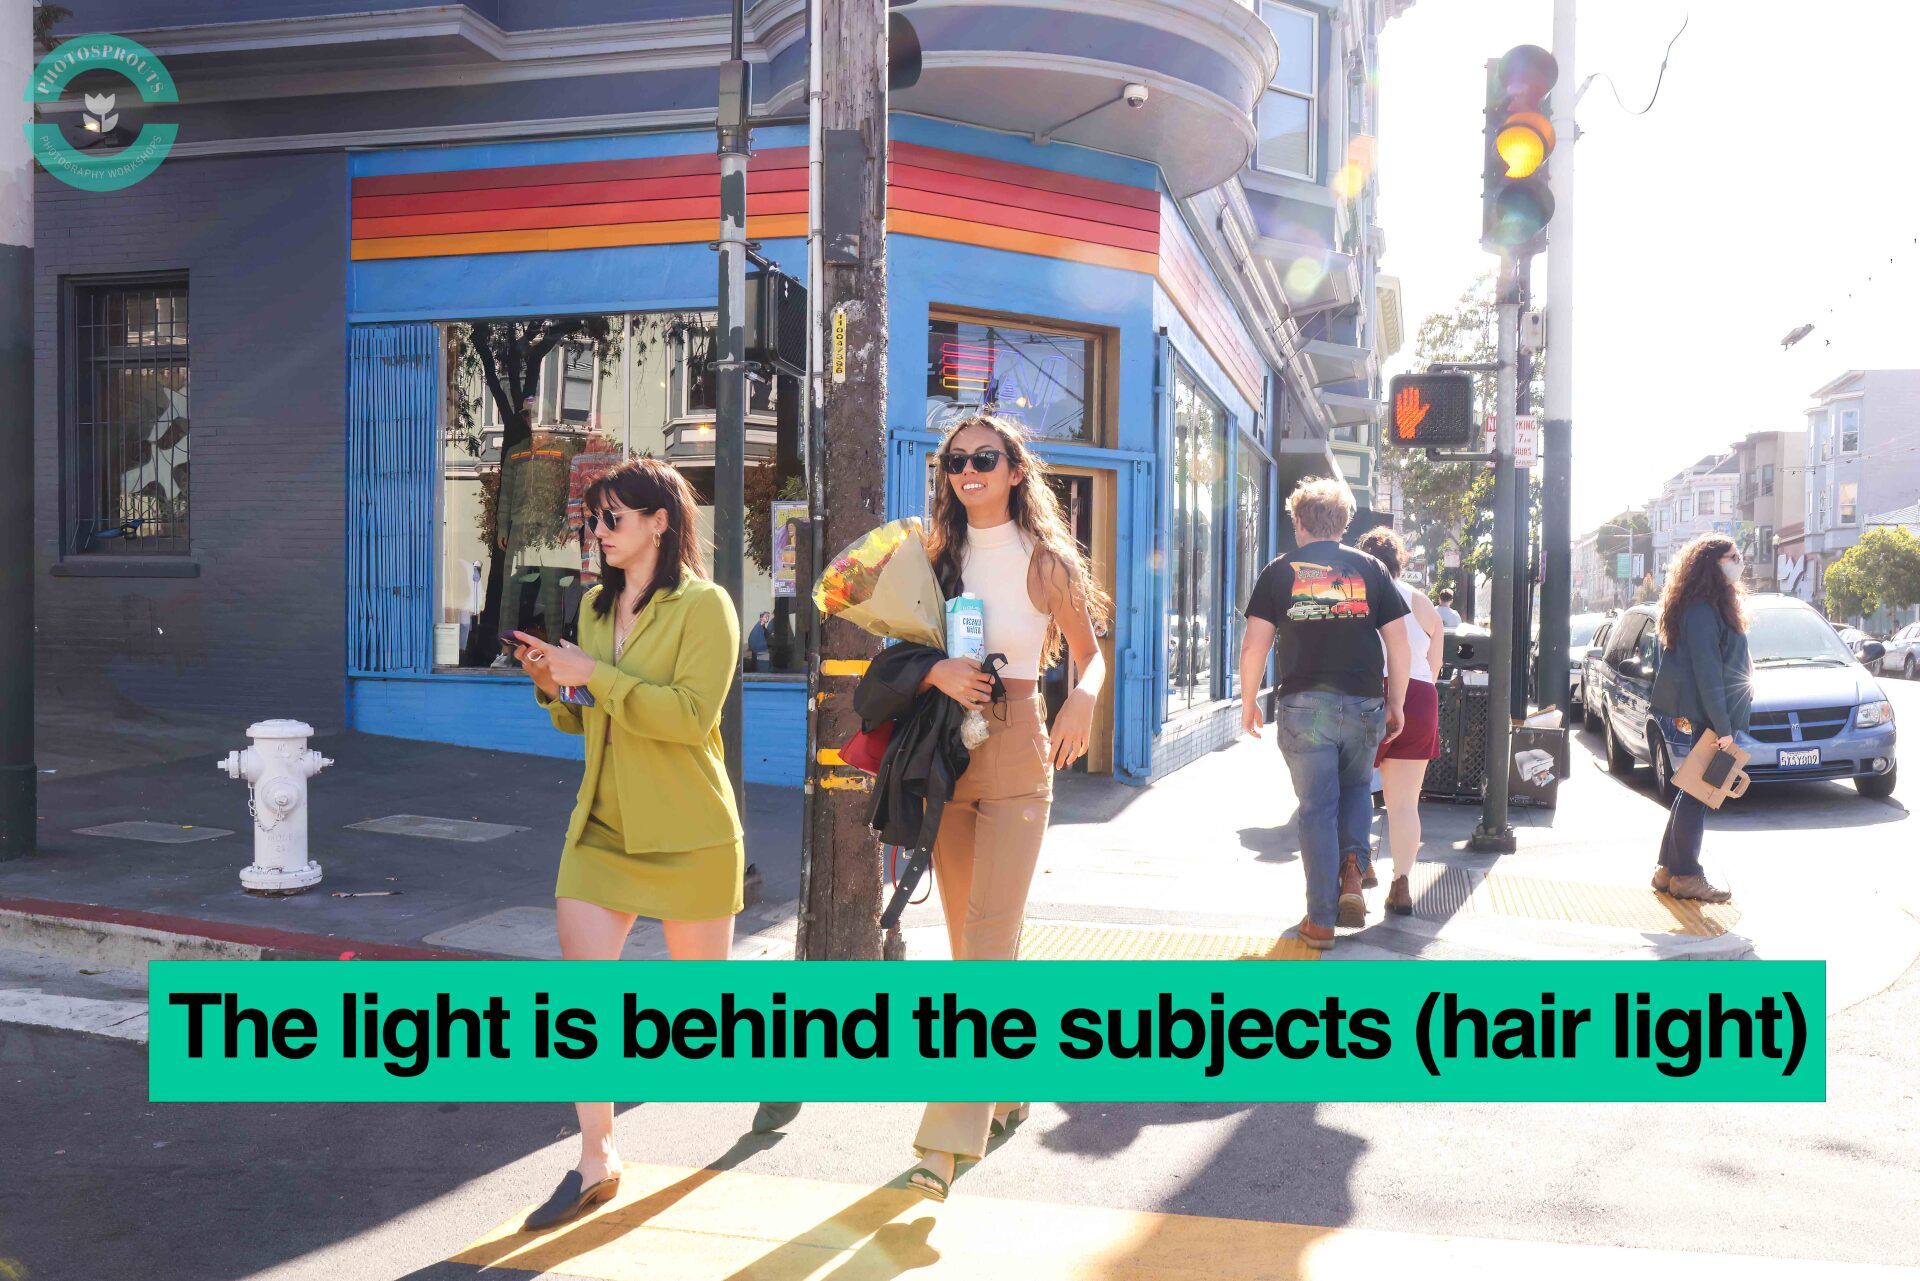
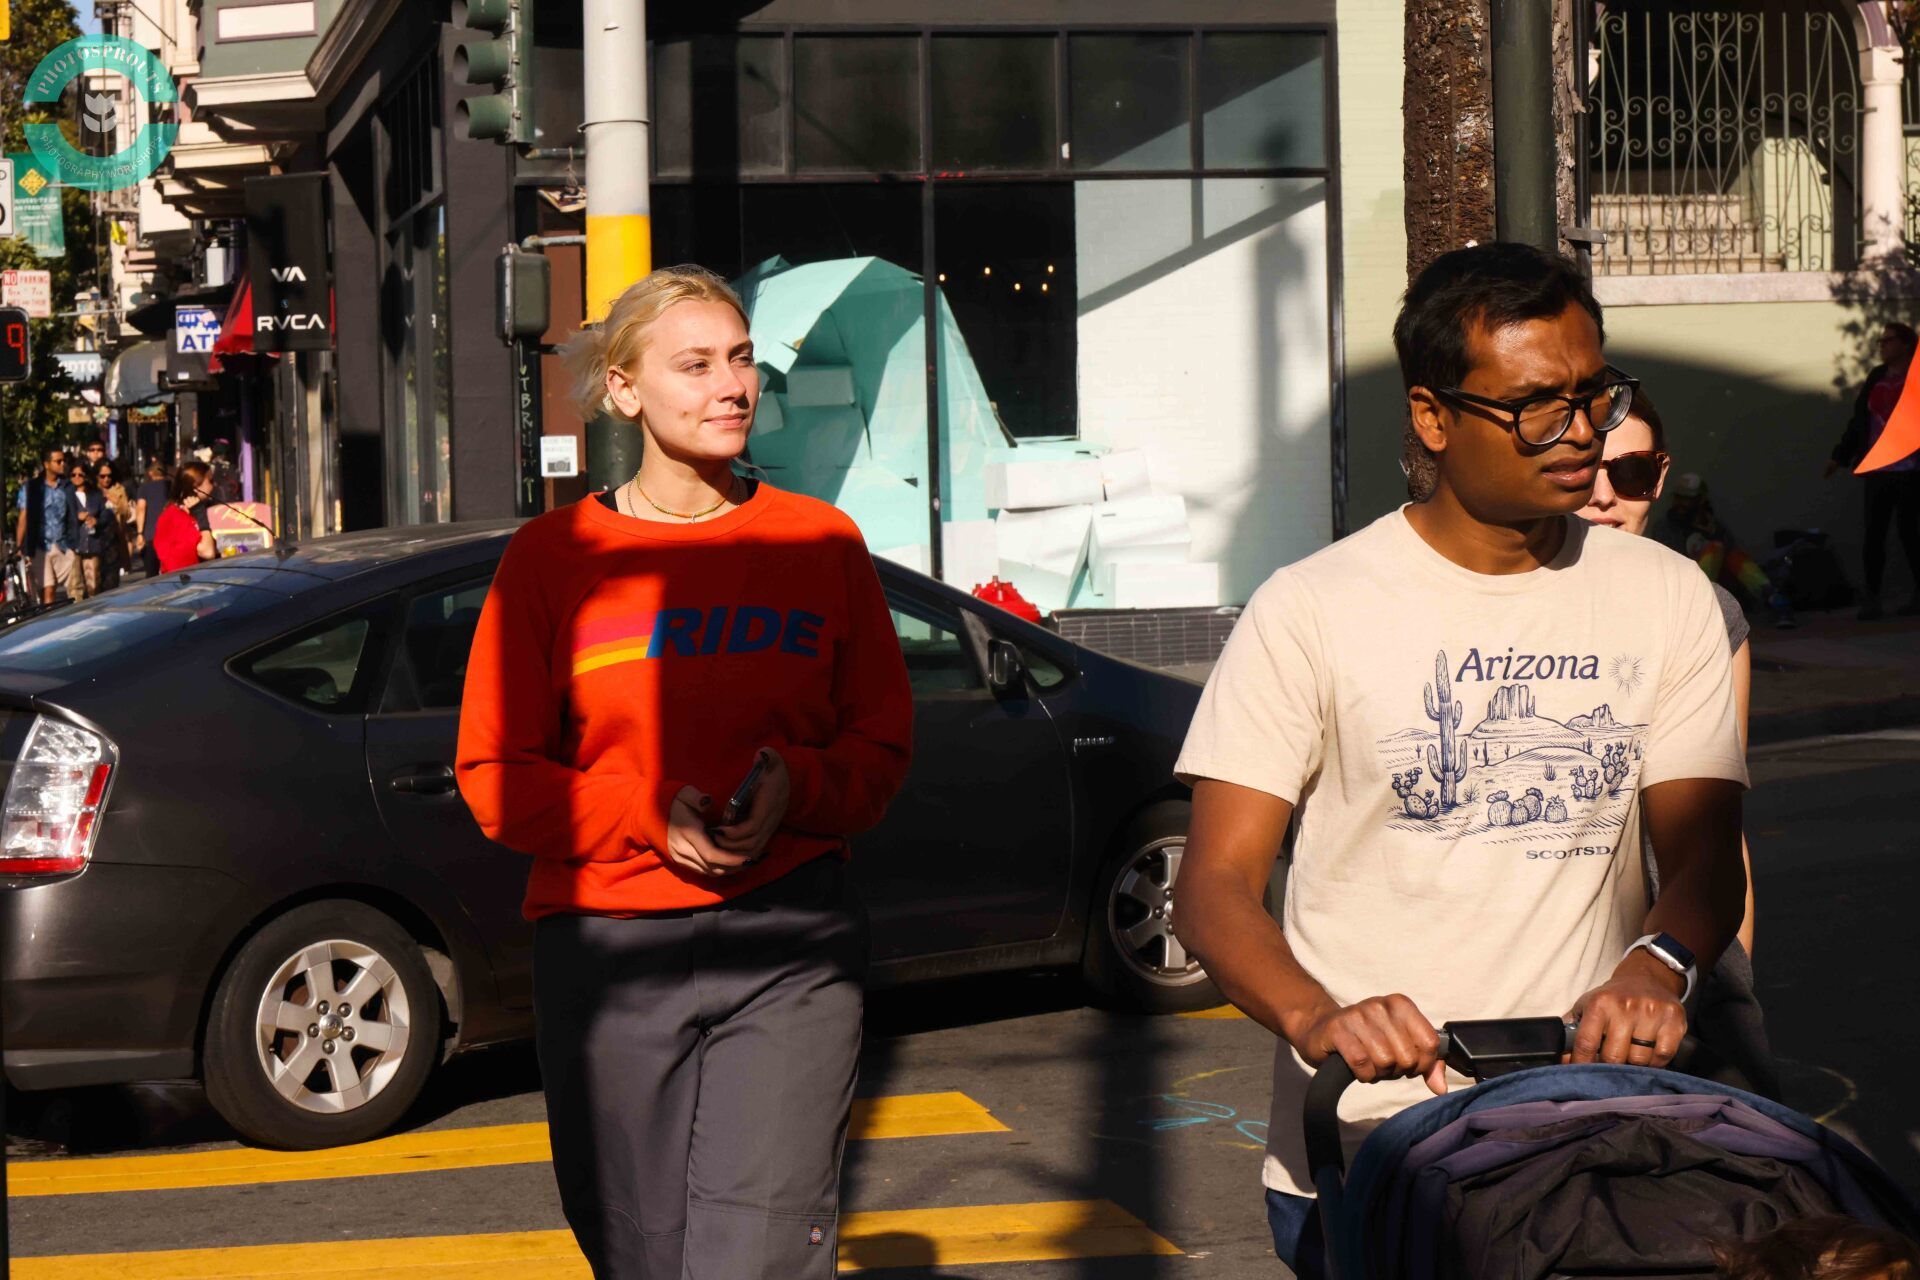
Pay attention to where the light hits the subject
Late afternoon, direct sunlight falls beautifully on the subjects as it creates distinctive nose shadows that sculpt the face.
We are looking for this type of harsh but angled sunlight when photographing people on the street. So, as you are walking down the street, do pay attention to where the light hits the subjects. The light might be hitting their hair (background will be washed out) instead of the faces. You have to turn around to walk in an opposite direction if that happens.
Direct light:
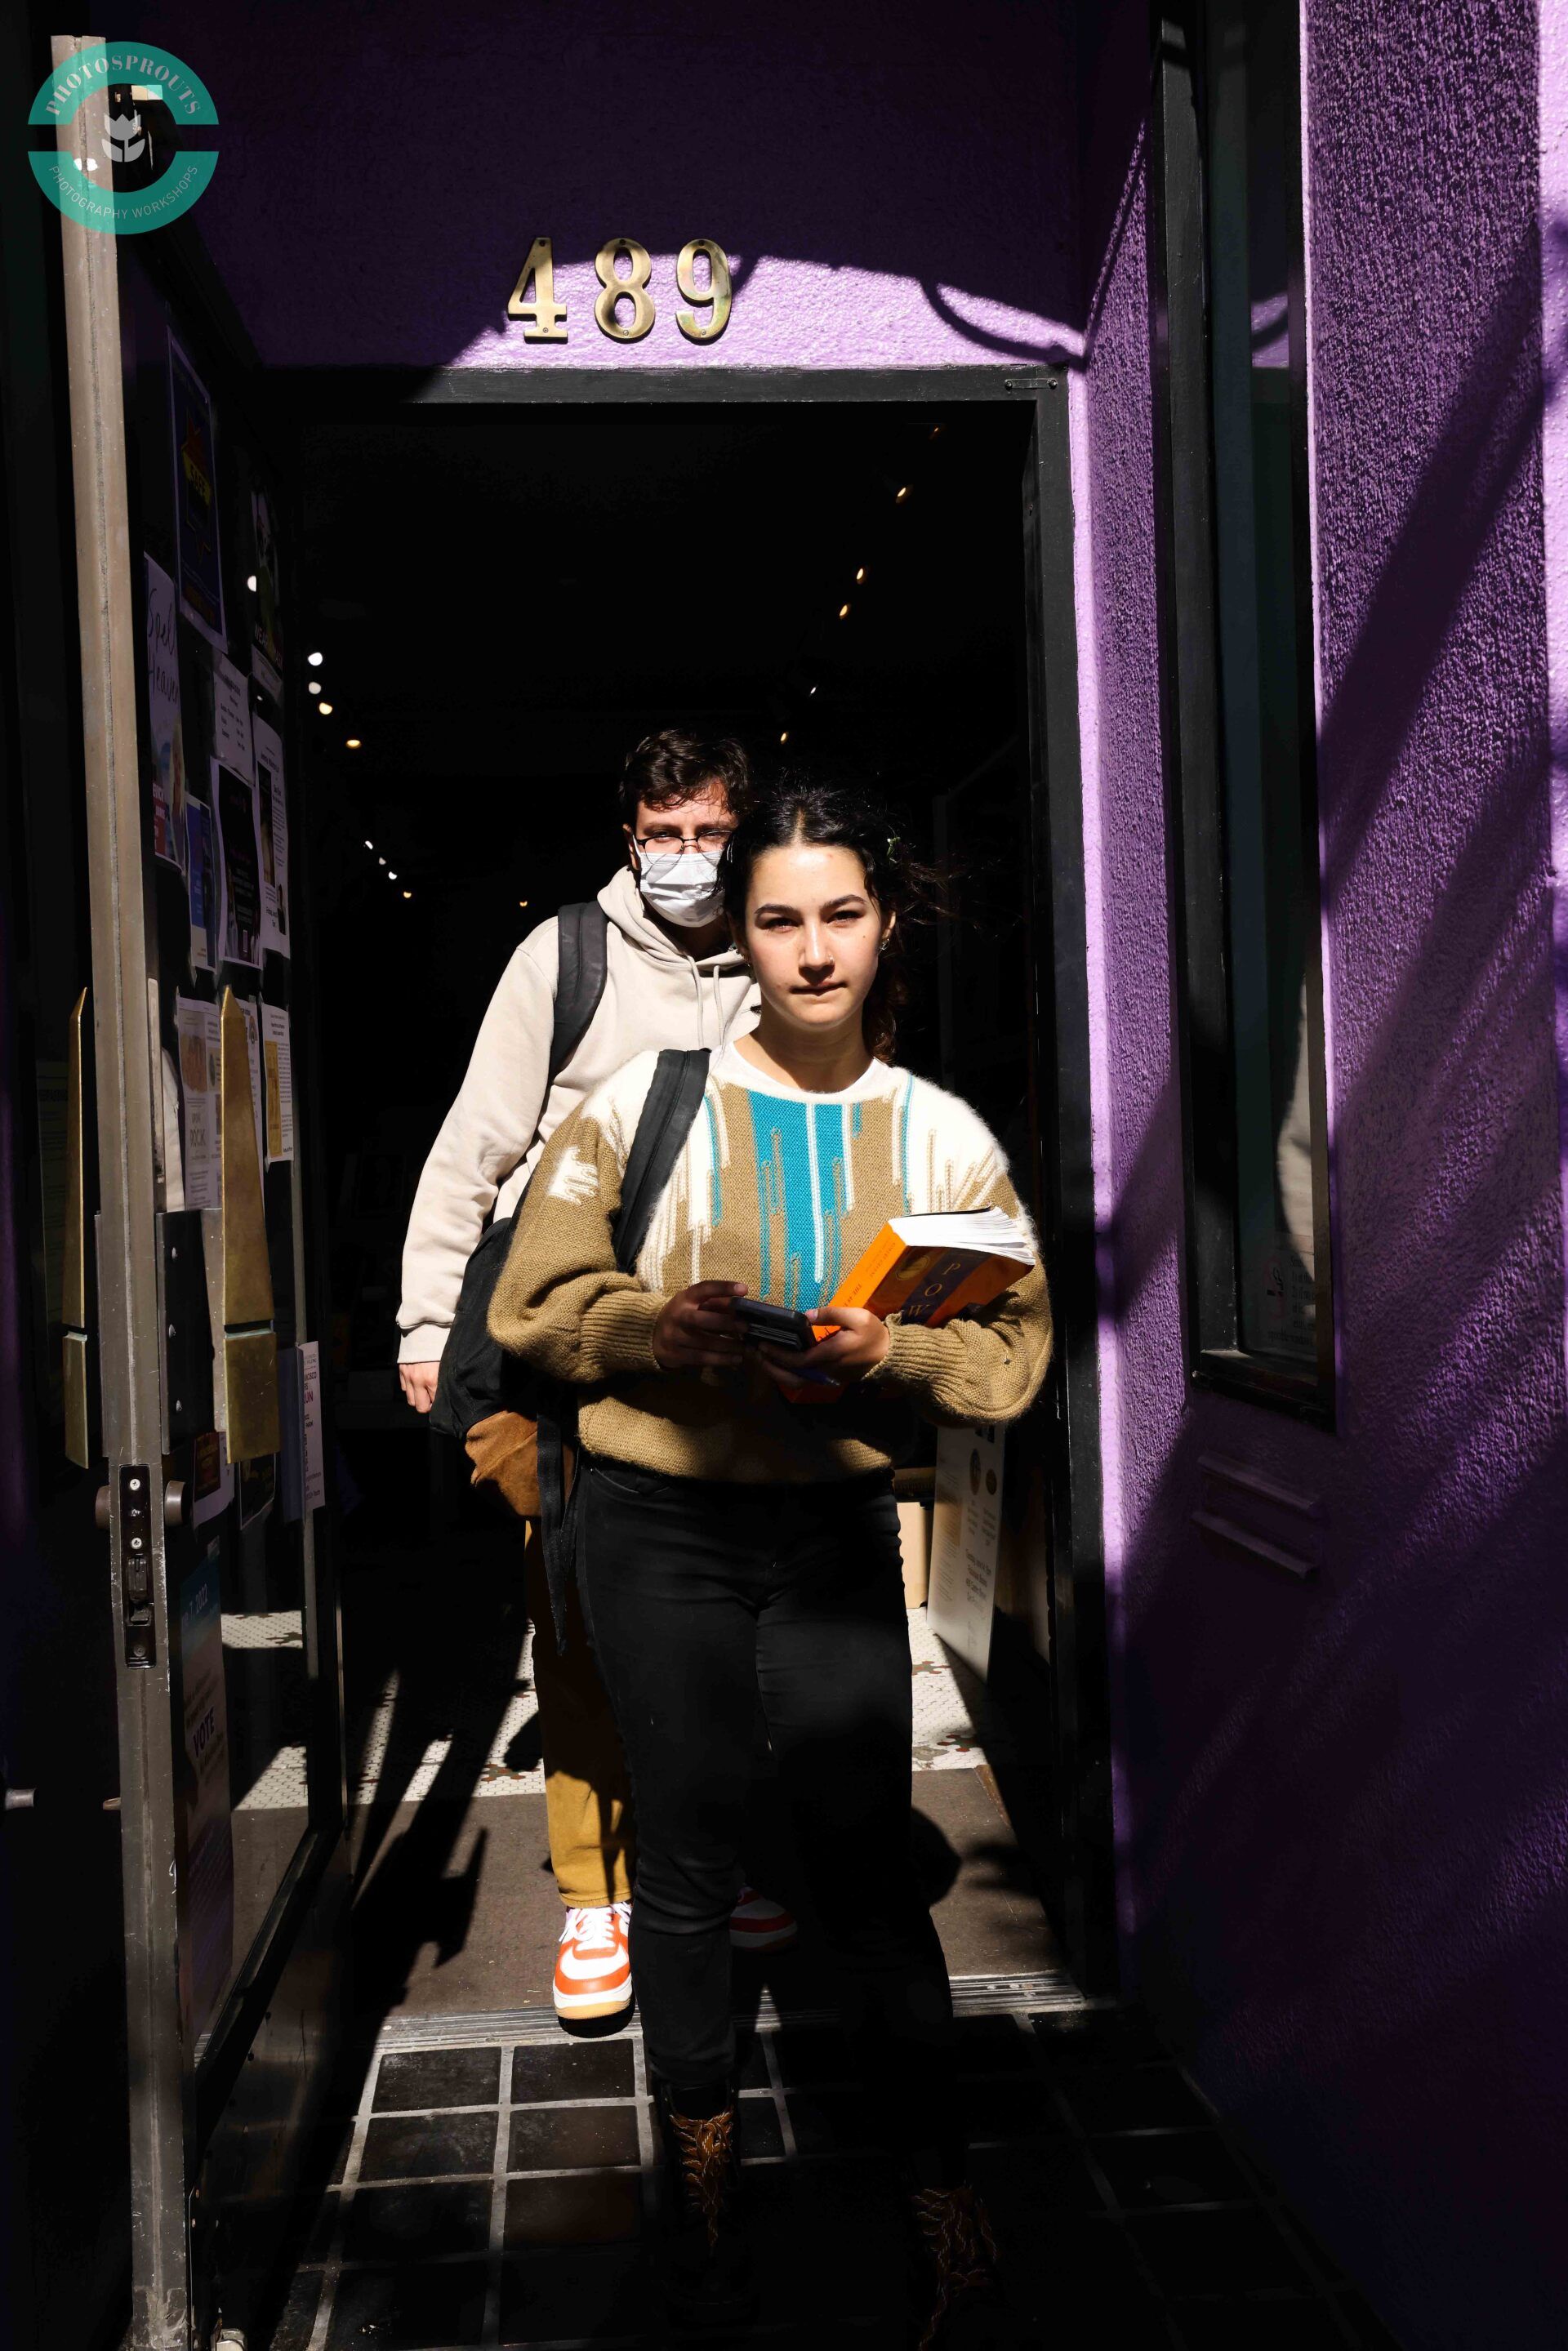
If so, just turn around and walk in the opposite direction. The light will be shining directly on the subjects' faces.
New Paragraph